

Although it doesn’t have the path to production like Docker and Kubernetes, it’s free (unlike VMware Fusion)
![]()
![]()
![]()
![]()
![]()
![]()
![]()
![]()
![]()
![]()
![]()
![]()
![]()
Overview
This is a hands-on introduction with insightful commentary carefully sequenced to make complex material easier to understand quickly. This is not a “demo”, but an immersive step-by-step “deep dive” tutorial aimed to make you productive.
NOTE: Content here are my personal opinions, and not intended to represent any employer (past or present). “PROTIP:” here highlight information I haven’t seen elsewhere on the internet because it is hard-won, little-know but significant facts based on my personal research and experience.
NOTE: Docker and Kubernetes is now a superior utility to Virtualbox. Their images are smaller and quicker to load. They have a path to production usage whereas Virtualbox command scripts are only for local use.
Virtualbox is free, unlike $350 VMWare Fusion On macOS. Their images are about the same size.
Nevertheless, some tutorials still reference Virtualbox. So here we are.
Before install
PROTIP: Instead of downloading the installer from https://www.virtualbox.org/ and clicking, use Homebrew on macOS.
-
Several editions of Virtualbox are available from Homebrew:
brew search virtualbox
Allow KEXT
To avoid error during install of Virtualbox (in the next step) with a message such as:
Error: Failure while executing; `/usr/bin/sudo -E -- /usr/bin/env LOGNAME=wilson_mar USER=wilson_mar USERNAME=wilson_mar /usr/sbin/installer -pkg /usr/local/Caskroom/virtualbox/6.1.16,140961/VirtualBox.pkg -target / -applyChoiceChangesXML /var/folders/r7/_4wzn4hn6yb2xxlms995lnkc0000gn/T/choices20201024-48615-1qc3jwx.xml` exited with 1. Here's the output:
installer: Package name is Oracle VM VirtualBox
installer: choices changes file '/var/folders/r7/_4wzn4hn6yb2xxlms995lnkc0000gn/T/choices20201024-48615-1qc3jwx.xml' applied
installer: Installing at base path /
installer: The install failed. (The Installer encountered an error that caused the installation to fail. Contact the software manufacturer for assistance. An error occurred while running scripts from the package “VirtualBox.pkg”.)
Enable kernel extension this Apple Technical Note “User-Approved Kernel Extension Loading” and:
If you run the brew command, you’ll get this pop-up:

-
Clicking on “Open Security Preferences” is equivalent to clicking the Apple icon for:
Apple icon → System PreferencesSecurity & Privacy → General tab

-
Click the yellow lock icon at the lower-left corner. Type your password.
-
Click Allow to remove the “Oracle” message.
-
Click the yellow lock icon again.
-
Press command+Q (or click the red dot) to dismiss the pop-up.
Download big OVA file
Files can be only if downloaded using wget if you are provided with a folder path URL *
So manually download by clicking the “Download” button at:
https://www.dropbox.com/s/11saxbkarayrs3d/cdv3.ova?dl=0
The cdv3.ova file is 4.5 GB large.
PROTIP: .ova image files contains the full operating system.
Install & Run Script
Below is a description of each steps, in GUI and CLI.
On macOS
-
Use Homebrew to install both GUI app and CLI programs from one installer:
brew install --cask virtualbox
Sample response:
==> Downloading https://download.virtualbox.org/virtualbox/6.1.16/VirtualBox-6.1.16-140961-OSX.dmg
Already downloaded: /Users/wilson_mar/Library/Caches/Homebrew/downloads/68e568735dc96f9aa3ada35a68557e4b1f41f13f17b86f1ad08fe410f74bc4fa--VirtualBox-6.1.16-140961-OSX.dmg
==> Verifying SHA-256 checksum for Cask 'virtualbox'.
==> Installing Cask virtualbox
==> Running installer for virtualbox; your password may be necessary.
==> Package installers may write to any location; options such as --appdir are ignored.
Password:
installer: Package name is Oracle VM VirtualBox
installer: choices changes file '/var/folders/r7/_4wzn4hn6yb2xxlms995lnkc0000gn/T/choices20201024-50422-lhk9yt.xml' applied
installer: Installing at base path /
installer: The install was successful.
==> Changing ownership of paths required by virtualbox; your password may be necessary
🍺  virtualbox was successfully installed!
GUI app
From here you can open the GUI:
open /Applications/VirtualBox.app
You can then manually click and type as described in documentation such as from Brent Laster (@BrentCLaster, author of Wrox “Professional Git” and OReilly “Jenkins 2 – Up and Running”, opensource.com ) at https://github.com/brentlaster/safaridocs/blob/master/cd-labs.pdf
https://learning.oreilly.com/live-training/courses/getting-started-with-continuous-delivery-cd/0636920417040/ OReilly “Getting started with continuous delivery (CD)”
CLI program
Scripts make use of the
-
Verify using the Virtualbox CLI program:
VBoxManage -v
Response at time of writing:
6.1.16r140961
-
Import appliance (.ova file) to designated folder:
The GUI top menu:
(Apple) VirtualBox File Machine Window Help -
Press command+I (or Pull down File to select “Import Appliance”).
-
Click the yellow folder icon and select the ova file.
The equivalent command:
OVA_FILE="~/Downloads/cd.ova"
-
Click Continue for the Appliance settings dialog.

-
Click “Import” and “Agree”. Wait for it, then the “Oracle VM VirtualBox Manager”:
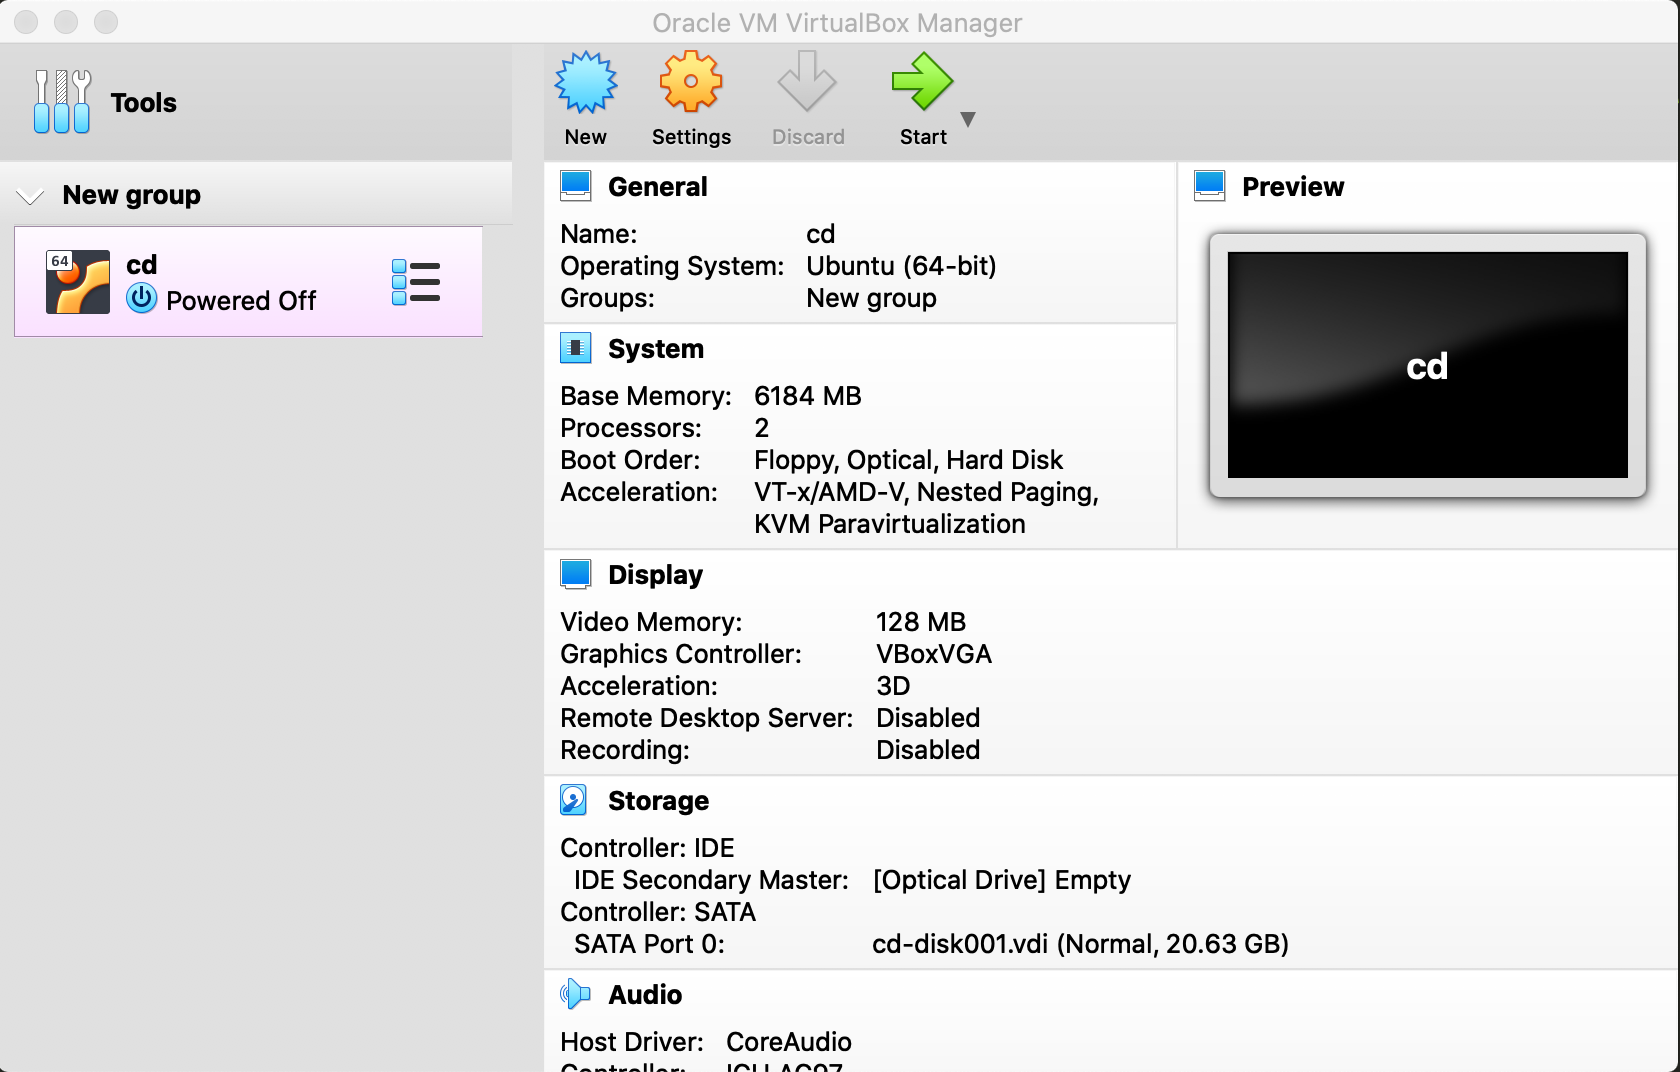

The equivalent command:
VM_NAME="cd"
VBoxManage import $OVA_FILE --vsys 0 --vmname $VM_NAME --eula accept
PROTIP: The default memory is 6GB (6184MB), which you can adjust. But first see how much memory is needed during actual usage.
-
The UI provides several ways to Start: Click the yellow arrow; If you have several ova file Groups, right-click on the one you want started to select “Start”, then “Normal” for GUI (not “Headless”).
The equivalent CLI:
VBoxManage startvm $VM_NAME -- type=headless
Waiting for VM "cd" to power on...
VM "cd" has been successfully started.
REMEMBER: Switch by pressing left command+C.
-
There are two messages that pop-up during install and also appear at the top of the client UI Desktop:

Check “Do not show this message again”, then click “Cancel” to the pop-up (do not Switch).

Check “Do not show this message again”, then click “Cancel” to the pop-up (do not Capture).
PROTIP: Avoid using “scaled mode”. Press command+F.
You should now be on the server Desktop.
-
Click “X” on the far right of each message to dismiss messages at the top of the screen about “Auto capture keyboard” and “mouse pointer integration” you can just click the x.
PROTIP: Keyboard shortcut command+Tab doesn’t work from within Virtualbox. So it helps to have a second monitor you can mouse to access macOS programs.
-
If you are given an option to upgrade ubuntu, decline.
Network Settings
- In the GUI Terminal Emulator, click on Terminal.
-
Verify that you have internet connectivity from the VM:
ping google.com
PING google.com (108.177.112.113) bytes of data.
-
Add a network adapter to the VM to configures the network adapter to work on host-only mode, connected to the vboxnet0 network:
VBoxManage modifyvm $VM_NAME --nic2 hostonly --hostonlyadapter2 vboxnet0
-
In the GUI Terminal, list all IP addresses from a given network and look for which one was assigned to the VM:
sudo apt-get install arp-scan
sudo arp-scan --interface=vboxnet0 --localnet
-
List all Guest VM properties:
VBoxManage guestproperty enumerate $VM_NAME
Others:
https://www.techrepublic.com/article/how-to-create-a-bash-script-for-starting-virtualbox-vms/
VBoxManage script
-
Open a Terminal PROTIP: You can access Virtualbox instances from a Terminal outside the Virtualbox using the VBOXManage CLI.
-
View documentation of VBoxManage at
-
View configuration details (the long story) for ALL virtual machines:
VBoxManage list vms --long
-
View configuration details (the long story) for a single virtual machines:
VBoxManage showvminfo "cd"
Create VM from CLI
-
PROTIP: See what operating system type are supported on your current machine:
VBoxManage list ostypes
-
VirtualBox comes with its own DHCP server:
VBoxManage list dhcpservers
https://www.virtualbox.org/manual/ch06.html#networkingmodes
VBoxManage list hostonlyifs
VBoxManage hostonlyif create
0%...10%...20%...30%...40%...50%...60%...70%...80%...90%...100%
Interface 'vboxnet0' was successfully created
-
This createvm.sh from Jose Gomez Castaño creates a WindowsXP instance:
name='XP_pepe'
os='Windows10_64'
sizeDisk=10000
isoPath='/home/pepe/virtualbox/wxp_sp2.ISO'
createPath='/home/pepe/virtualbox/'

VBoxManage createhd --filename $createPath$name'/'$name.vdi --size $sizeDisk
VBoxManage createvm --basefolder $createPath --name $name --ostype $os --register
VBoxManage storagectl $name --name "IDE Controller" --add ide
VBoxManage storageattach $name --storagectl "IDE Controller" --port 0 --device 0 --type dvddrive --medium $isoPath
VBoxManage storagectl $name --name "SATA Controller" --add sata --controller IntelAHCI
VBoxManage storageattach $name --storagectl "SATA Controller" --port 0  --device 0 --type hdd --medium $createPath$name'/'$name.vdi
VBoxManage modifyvm $name --boot1 dvd --boot2 disk --boot3 none --boot4 none
VBoxManage modifyvm $name --memory 1024 --vram 128
VBoxManage modifyvm $name --nic1 bridged --bridgeadapter1 eth0
VBoxHeadless -s $name
Do work
-
Invoke application programs in the Virtualbox.
-
PROTIP: Keyboard shortcut command+Tab doesn’t work from within Virtualbox. So it helps to have a second monitor you can mouse to access macOS programs.
Resources
-
Set up a VirtualBox VM with 4 VBoxManage commands: How to create an IP-connectable virtual machine through the CLIa> using code from https://github.com/ricardolsmendes/vboxmanage-ova-setup
-
Try it:
https://www.linuxtechi.com/manage-virtualbox-virtual-machines-command-line/
A video on working with VirtualBox is at Pluralsight “Linux Server Virtualization” course by David Clinton 5 May 2016
https://app.pluralsight.com/library/courses/linux-server-virtualization-lpic3-304-1/table-of-contents
https://bootstrap-it.com/docker4aws/
https://www.udemy.com/course/oracle-virtualbox-mastercourse/ was last updated 2/2017.