

My experiments at coding Python for production use of Vault on AWS, Azure, GCP, in a production setting
![]()
![]()
![]()
![]()
![]()
![]()
![]()
![]()
![]()
![]()
![]()
![]()
![]()
Overview
- Why this?
- Get it on your laptop
- Repo folders and files
- What’s special about this Python program
- Sections grouping functions
- View Code scanning
- Edit .env file
- Sections of code (and their feature flags)
- Run it already
- Imports
- Parameters in Click Framework (not Argparse)
- Deploy ML Model Titanic dataset on GCP
- Date and Time Handling
- Location-based data processing
- Block comments
- “Dunder” variables
- 1. Import of Libraries
- 2. Define starting time and default global values
- 3. Parse arguments that control program operation
- 4. Define utilities for printing (in color), logging, etc.
- Logging
- 5. Obtain run control data from .env file in the user’s $HOME folder
- Localization
- 7. Display run conditions: datetime, OS, Python version, etc.
- 7. Define utilities for managing data storage folders and files
- 8. Front-end
- 9. Generate various calculations for hashing, encryption, etc.
- Passlib
- Base64 Salt
- Encryption and decryption
- 9.4. Generate a fibonacci number recursion = gen_fibonacci
- External caching in Azure Cache for Redis
- 9.9 Make change using Dynamic Programming = make_change
- Make Change Dynamically
- 9.10 Fill knapsack = fill_knapsack
- 9.8. Convert between Roman numerals & decimal = process_romans
- Alternative: Pure Python GeoIP API = https://github.com/appliedsec/pygeoip
- 13. Retrieve Weather info from zip code or lat/long = show_weather
- 14. Retrieve secrets from local OS Keyring = use_keyring
- 14. Retrieve secrets from GitHub Action = use_github_actions
- use_azure
- 14.2 Use Azure Redis Cache for Memoization
- 14.5 Microsoft Graph API
- use_aws
- Using GCP (Google Cloud Platform) = use_gcp
- Run from GCP (Google Cloud Platform) Cloud Shell = use_gcp
- Google Text-to-Speech
- SECTION 17. Retrieve secrets from HashiCorp Vault
- 16. Retrieve secrets from GCP = use_gcp
- 17. Retrieve secrets from HashiCorp Vault = use_vault
- More APIs
- Asana API
- Verify Email
- Gravatar from MD5 Hash of email
- Stand-alone execution
- Difference between two images
- 96. Text to Speech file and play mp3
- UI Libraries
- Coursera Google IT Automation Professional Certificate
- Strings interned?
- Profiling Python Code
- Bandit vulnerability checker
- Parallel Dask
- AzureML
- Access Google Sheets
- Image manipulation
- Working with GCP
- Performance Testing
- References
- Other APIs
- Run metrics databases online
- Keep processing messages from appearing
- 100 Days of Code
- Code Formatting Tools
- Debugging
- Security operations
- Resources
- More about Python
This article describes my work on the Python source code at:
The Python program is installed (along with utilities), then invoked by you running shell file:
The program is invoked by you running shell file:
I’d love to get your opinion on all this.
NOTE: Content here are my personal opinions, and not intended to represent any employer (past or present). “PROTIP:” here highlight information I haven’t seen elsewhere on the internet because it is hard-won, little-know but significant facts based on my personal research and experience.
Why this?
I created this as an experiment to fill several gaps.
A. Many companies make candidates suffer through evaluations of programming skills (using HackerRank, etc.) even though such skills are rarely used in some jobs.
So no matter what job we have, we need to keep our programming skills up to get the next job.
B. Programming is a fun hobby. For me. This is especially facinating in the age of AI bots.
C. Concern about potential malicious libraries among insecure transitive dependencies (in the supply chain) has forced products such as Walmart Labs’ Hapi.js to not use any external libraries. So funtionality needs to be brought back in from external libraries.
D. I like working toward being a craftsman at programming, like a painter who creates intricate artwork. This article presents an example of my experiments on how to handle complexity for resilency.
g
Get it on your laptop
Before being able to run the code, several utilities need to be installed on top of the macOS Operating System:
- macOS utilities gcc, make, brew, conda/Python, jq, git, gh, etc.
- Python and Virtualenv
- Download of folders and files from github.com
-
Open a macOS Terminal.
-
To view the code
-
in GitHub online at:
https://github.com/wilsonmar/python-samples/blob/main/python-samples.py
-
on your laptop after download from GitHub
-
using Cloud9 online
-
navigate to where you want the repo added.
-
Open your macOS Terminal to use that git program installed:
git clone https://github.com/wilsonmar/python-samples.git
-
Navigate into the folder created:
cd python-samples
-
Using “code” (VSCode), PyCharm, or other editor (IDE) to open the whole folder. For vscode it’s with a dot to specify the whole folder:
code .
-
Within your editor’s left menu, click on python-samples.py to open it for edit.
Repo folders and files
The most important files within the python-samples repo:
-
python-samples.py is a template containing the base coding for “production-worthy” coding, based on coding tricks explained in my blog article at wilsonmar.github.io/python-coding.
-
python-samples.sh is a Bash shell script which installs It installs all the utilities and run folders the Python program needs. Also, calls for human manual authentication (such as az and gcloud login) are done before invoking the Python program. The script was developed on macOS. TODO: Adaptation and testing on Linux & Windows.
For users of HashiCorp Vault, the shell file installs and runs (in background) a Vault Agent as a localhost “webapp-through-agent” proxy to cache responses from a corporate Vault server, in order to both reduce network traffic and automate lease renewals.
The shell file also copies file python-samples.env in the repo to the user’s $HOME folder (if it’s not already there) for customization (user’s email address, etc.). This is so secrets in cannot be pushed back into the public cloud.
-
vault-agent.hcl is accessed by the local HashiCorp Vault Agent (running persistant caching of leased secrets locally).
-
python-samples.env stores key/value pairs our Python program retrieves into variables that control program execution. More about this below.
-
.gitignore defines files and folders (such as python-samples.env noted above) and those recreated during each run – what git does NOT push back into GitHub.
PROTIP: python-samples.sh being specified in .gitignore is an additional precaution. Others mention making that a symlink (to $HOME/….env) so that its contents would show where that file actually resides. But I don’t do that because I prefer that the program NOT access the .env file in that folder.
-
country_info.xls and Google Sheet are both generated from and created using file
country_info.csv, which contain relatively static information about each country in the world, such as currency codes, mobile phone prefix, etc. Such data can be a use case for an in-memory database / caching service. Our Python code sample uses the .csv file to create the
database.sqlite file for reference by the sqlite functionality the comes with Python. -
workflow is a folder containing files used by GitHub Actions for CI/CD (Continuous Integration) automation. Others may add circlci, travis, etc. for other automation.
What’s special about this Python program
Let’s walk though python-samples.py to highlight what are unusual and controversial:
A. PROTIP: Many errors are not apparent until the logic is run more than once. So, near the bottom of the source file, the main is an infinite loop, controlled by these variables:
- main_loop_runs_requested=1 = number of iterations to repeat (default of one)
- main_loop_run_pct=100 = the percentage of time between iteration is varied randomly
- main_loop_pause_seconds=0 = number of average seconds between each iteration (default of zero)
This enables the program to be used for testing (functional and capacity/performance).
B. Feature control variables are referenced inside functions to act as a type of “kill switch” to determine whether the function is actually executed each run.
Fine-grained control means control variable per function.
C. Each control variable can have of of these values:
- True or 100 = run every time
- False or 0 = never run
- 36 (or whatever number) = run 36% of the time
D. A set of feature flags are defined in each of several .env/config files.
Different env/config specification files can be specified for each iteration and evironment (local, test, primary production, DR production, etc.).
E. Variables also include secrets (API keys), geolocation variables (country, locale, language, etc.).
F. API calls securely retrieve secrets online from:
- HashiCorp Vault
- use_azure Azure Key Vault
- use_aws = AWS KMS (Key Management Service)
- use_gcpGCP Secrets Manager
G. API calls to dynamically obtain localized text, external IP address, geocoding, weather by IP address or zip code, etc.
Flask Blueprints are used to reduce API resilience amid complexity.
H. Dynamic custom text can optionally be sent to:
- a local text-to-speech engine to be voiced in an mp3 file
- to a mobile phone via SMS (using Twillio.com)
- to an email address via SMTP
- to a Slack channel
I. Program code included measures the wall time and memory used by each of several individual sections of the program, each separate iteration, as well as the program as a whole.
J. When the program is invoked in a CLI terminal, flags can be specified to control the verbosity of what the program displays.
K. When the program starts, “metadata” about the conditions of the run are output for troubleshooting or historical comparison.
L. Metrics captured can be sent to various cloud-based time-series databases for analysis and trend analytics on online cloud services:
- Time to load imports
- Time taken by each function (along with amount of data processed)
M. TODO: Federated cloud authentication (Single Sign On):
- Okta
- OAuth
- Ping Identity
- AWS Cognito
- Google Firebase
- Salesforce
N. TODO: Access cloud database through a ORM (Object Relational Mapping) layer
- SQL Alchemy for Python with rich API for complext queries to MySQL, Postgres, SQLite, Oracle https://realpython.com/flask-connexion-rest-api/ https://realpython.com/flask-connexion-rest-api-part-3/
- Prisma client supports many databases via easy relation API
- Mongoose for MongoDB & NodeJs to create models & schemas middlewear
- Sequelize for MySWL & NodeJs with migrations, model associations, hooks
O. TODO: Cloud databases
- Supabase.io (open-source alternative to Firebase - no company lock-in - auth, auto-gen APIs, PostgreSQL Dino/TypeScript Edge Functions, subscriptions, Vector embeddings, row-level security)
- Google Firebase (closed source) NoSQL with auth, )
- MongoDB Atlas
- Google Firebase (closed source) NoSQL with auth
- Google Spanner
- FaunaDB (ACID for SQL, NoSQL, GraphQL)
P. TODO: Tkinter tk GUI macOS desktop apps with Python and Kivy on iOS & Android mobile
Q. TODO: Each function is defined with a PyDoc description that Sphix reads to create reStructuredText (RST) markup language docs hosted by Read the Docs.org.
R. Call based on generated JSON/YAML via an OpenAPI gateway (Apigee Swagger)
S. Google Developer Portal
https://realpython.com/courses/zipfile-python/
https://realpython.com/courses/python-file-system-exercises/
https://realpython.com/python-folium-web-maps-from-data/
https://realpython.com/generate-images-with-dalle-openai-api/
https://realpython.com/python-get-current-time/
https://realpython.com/python-web-scraping-practical-introduction/
References:
Sections grouping functions
This program began as a way to organize implementations of various coding tricks, to ensure that I can import of the various base dependencies:
PROTIP: Related functions are grouped together.
-
gen_1_in_100 = Generate a random percent of 100 - to determine how often a specific feature is run
- gen_fibonacci = Generate Fibonacci with memoization (saving results in a file to improve speed)
- make_change = Make change using “Dynamic Programming”
-
fill_knapsack = Fill knapsack
I then added – in one place – utility features such as:
- display_run_stats = Display run time stats comparing time stamps at the beginning and end of program run
- show_env = Show the program’s running environment (OS, Python version, IP address, etc.
- lookup_ipaddr = Lookup geolocation info from IP Address
- lookup_zipinfo = Obtain Zip Code to retrieve Weather info
-
show_weather = Retrieve Weather info from zip code or lat/long
-
categorize_bmi Calculate BMI using metric vs. imperial units of measure based on the user’s country. I know that only two countries in the world uses the antiquatd imperial units Americans use. But it’s an excuse to show how a csv file (Country codes included in the repo) can be loaded into a SQLite database or in-memory one for lookup.
- gen_hash = Generate Hash from a file & text
- gen_salt = Generate a random salt
-
gen_jwt = Generate JWT (JSON Web Token)
More Python coding tricks:
- process_romans = Convert between Roman numerals & decimal as an example of the new case structure in Python 3.10
- gen_lotto = Generate Lotto America Numbers
-
gen_magic_8ball = Generate Magic 8-ball numbers (to help you make a decision)
Some things that can be done (perhaps cheaper and faster) on a local machine than in the cloud:
- gen_sound = Generate text to speech locally to a mp3 sound file
- download_imgs = Download img application files
- process_img = Manipulate image (using OpenCV OCR extract)
-
cleanup_img_files = Remove (clean-up) folder/files created
- send_sms = Send SMS text to a mobile phone (via Twillio)
- send_slack_msgs = Send messages into Slack
- send_email = Send email (via Gmail)
-
send_fax = Send a fax (via Gmail)
-
logging = Send logs to a SIEM (Splunk, Datadog, etc.)
-
The program can be initiated with different arguments.
- main_loop_runs_requested=1 specifies how many times the program repeats, with a default of one, which means it works like regular programs. Setting it to zero makes the program run infinitely (until cancelled manually).
-
main_loop_pause_seconds=0 specifies how long the program sleeps after each iteration. Setting it to 999 would be recognized by the program to stop for a manual prompt after every iteration.
### Configuration settings and Secrets
- use_env = Retrieve secrets and configuration settings from an .env file
-
use_vault = Store/Retrieve secrets from HashiCorp Vault
Multi-Cloud
The thing we’re working on now is having one codebase that can do the same thing across major cloud service providers (CSPs) – AWS, Azure, Google.
All that enables the ability to compare how different clouds work:
- Login
- List resources
- Save/Retrieve files, folders
- Pub/Sub events
- Create/read SQL databases
View Code scanning
The code has been scanned by PEP8, Badit, $99/month PyUp, Requires, and others mentioned at https://geekflare.com/find-python-security-vulnerabilities/
Lines such as these requests exemption from some rules:
-
[B303:blacklist] Use of insecure MD2, MD4, MD5, or SHA1 hash function.
- [B605:start_process_with_a_shell] Starting a process with a shell, possible injection detected, security issue. More Info: https://bandit.readthedocs.io/en/latest/plugins/b605_start_process_with_a_shell.html
lambda: os.system('cls' if os.name in ('nt', 'dos') else 'clear') -
[B311:blacklist] Standard pseudo-random generators are not suitable for security/cryptographic purposes. in gen_1_in_100, gen_lotto, and gen_magic_8ball.
-
[B602:subprocess_popen_with_shell_equals_true] subprocess call with shell=True identified,
- [B105:hardcoded_password_string] Possible hardcoded password: ‘dev-only-token’
See:
Virtualenv
A virtual environment enables a specific set of Python dependencies to be installed, so no weird, difficult-to-debug dependency issues arise.
When installing venv:
“venv” is the preferred name of an environment. But if you want customization, variable my_venv_folder is used.
-
Detect whether the folder (defined by variable my_venv_folder) has been created:
PROTIP: Python code running a Linux operating system command.
if run("which python3").find(my_venv_folder) == -1: # not found: # Such as /Users/wilsonmar/miniconda3/envs/py3k/bin/python3 # So create the folder inside the program's folder: python3 -m venv ${my_venv_folder} -
Activation is necessary. To activate on a Mac:
source "{my_venv_folder}"/bin/activateOn Windows:
venv\Scripts\activate.bat
-
To check if a virtual environment is active, In CLI, (venv) appears. The path of the venv folder should appear:
echo "$CONDA_ENV_NAME"
Within Python: check whether the VIRTUAL_ENV environment variable is set to the path of the virtual environment:
-
Outside a virtual environment, sys.prefix points to the system python installation and sys.real_prefix is not defined.
-
Inside a virtual environment, sys.prefix points to the virtual environment python installation and sys.real_prefix points to the system python installation.
-
-
Create the Conda enviornment:
conda create -n "$CONDA_ENV_NAME" python=3.10
bzip2              conda-forge/osx-64::bzip2-1.0.8-h0d85af4_4
  ca-certificates    conda-forge/osx-64::ca-certificates-2023.5.7-h8857fd0_0
  libffi             conda-forge/osx-64::libffi-3.4.2-h0d85af4_5
  libsqlite          conda-forge/osx-64::libsqlite-3.42.0-h58db7d2_0
  libzlib            conda-forge/osx-64::libzlib-1.2.13-h8a1eda9_5
  ncurses            conda-forge/osx-64::ncurses-6.4-hf0c8a7f_0
  openssl            conda-forge/osx-64::openssl-3.1.1-h8a1eda9_1
  pip                conda-forge/noarch::pip-23.1.2-pyhd8ed1ab_0
  python             conda-forge/osx-64::python-3.10.11-he7542f4_0_cpython
  readline           conda-forge/osx-64::readline-8.2-h9e318b2_1
  setuptools         conda-forge/noarch::setuptools-67.7.2-pyhd8ed1ab_0
  tk                 conda-forge/osx-64::tk-8.6.12-h5dbffcc_0
  tzdata             conda-forge/noarch::tzdata-2023c-h71feb2d_0
  wheel              conda-forge/noarch::wheel-0.40.0-pyhd8ed1ab_0
  xz                 conda-forge/osx-64::xz-5.2.6-h775f41a_0
NOTE: The above don’t need to be imported.
-
Get a list of all that was installed:
pip freeze >requirements.txt
Repeat this command after more packages are added.
-
Activate:
conda activate "$CONDA_ENV_NAME"
You should now see “(py310)” under every prompt.
-
Verify:
python --version
You should see:
Python 3.10.11
Any other version means that you’re in the wrong env (such as base).
-
If you don’t want it anymore:
conda deactivate
conda remove --name "$CONDA_ENV_NAME" --all
-
To avoid errors:
conda config --set restore_free_channel true
conda config --set offline false
-
List conda environments on your computer:
conda info --envs
WARNING: Each conda environment contains its own set of Python libraries for a specific version of Python. So each conda enviornment consumes a significant of disk space.
-
IMPORTANT: Use conda instead of pip to install libraries. For example:
conda install -c conda-forge azure-core
PROTIP: Notice that the library is named “azure-core” (with the dash separator) when inside Python it’s import azure.core with the dot separator.
PROTIP: The command draws from: https://anaconda.org/conda-forge/azure-core
  azure-core         conda-forge/noarch::azure-core-1.27.1-pyhd8ed1ab_0
  brotli             conda-forge/osx-64::brotli-1.0.9-hb7f2c08_8
  brotli-bin         conda-forge/osx-64::brotli-bin-1.0.9-hb7f2c08_8
  certifi            conda-forge/noarch::certifi-2023.5.7-pyhd8ed1ab_0
  charset-normalizer conda-forge/noarch::charset-normalizer-3.1.0-pyhd8ed1ab_0
  idna               conda-forge/noarch::idna-3.4-pyhd8ed1ab_0
  libbrotlicommon    conda-forge/osx-64::libbrotlicommon-1.0.9-hb7f2c08_8
  libbrotlidec       conda-forge/osx-64::libbrotlidec-1.0.9-hb7f2c08_8
  libbrotlienc       conda-forge/osx-64::libbrotlienc-1.0.9-hb7f2c08_8
  pysocks            conda-forge/noarch::pysocks-1.7.1-pyha2e5f31_6
  requests           conda-forge/noarch::requests-2.31.0-pyhd8ed1ab_0
  six                conda-forge/noarch::six-1.16.0-pyh6c4a22f_0
  typing-extensions  conda-forge/noarch::typing-extensions-4.6.3-hd8ed1ab_0
  typing_extensions  conda-forge/noarch::typing_extensions-4.6.3-pyha770c72_0
  urllib3            conda-forge/noarch::urllib3-2.0.3-pyhd8ed1ab_0
conda install -c conda-forge azure-cli-core
  adal               conda-forge/noarch::adal-1.2.7-pyhd8ed1ab_0
  antlr-python-runt~ conda-forge/noarch::antlr-python-runtime-4.13.0-pyhd8ed1ab_0
  applicationinsigh~ conda-forge/noarch::applicationinsights-0.11.9-py_0
  argcomplete        conda-forge/noarch::argcomplete-3.1.1-pyhd8ed1ab_0
  azure-cli-core     conda-forge/noarch::azure-cli-core-2.0.61-py_0
  azure-cli-telemet~ conda-forge/osx-64::azure-cli-telemetry-1.0.2-py310h2ec42d9_4
  azure-common       conda-forge/noarch::azure-common-1.1.28-pyhd8ed1ab_0
  azure-mgmt-resour~ conda-forge/noarch::azure-mgmt-resource-2.1.0-py_0
  bcrypt             conda-forge/osx-64::bcrypt-3.2.2-py310h90acd4f_1
  blinker            conda-forge/noarch::blinker-1.6.2-pyhd8ed1ab_0
  cffi               conda-forge/osx-64::cffi-1.15.1-py310ha78151a_3
  colorama           conda-forge/noarch::colorama-0.4.6-pyhd8ed1ab_0
  cryptography       conda-forge/osx-64::cryptography-41.0.1-py310ha1817de_0
  humanfriendly      conda-forge/osx-64::humanfriendly-10.0-py310h2ec42d9_4
  isodate            conda-forge/noarch::isodate-0.6.1-pyhd8ed1ab_0
  jmespath           conda-forge/noarch::jmespath-1.0.1-pyhd8ed1ab_0
  knack              conda-forge/noarch::knack-0.5.1-py_0
  libsodium          conda-forge/osx-64::libsodium-1.0.18-hbcb3906_1
  msrest             conda-forge/noarch::msrest-0.7.1-pyhd8ed1ab_0
  msrestazure        conda-forge/noarch::msrestazure-0.6.4-pyhd8ed1ab_0
  oauthlib           conda-forge/noarch::oauthlib-3.2.2-pyhd8ed1ab_0
  paramiko           conda-forge/noarch::paramiko-3.2.0-pyhd8ed1ab_0
  portalocker        conda-forge/noarch::portalocker-1.2.1-py_0
  pycparser          conda-forge/noarch::pycparser-2.21-pyhd8ed1ab_0
  pygments           conda-forge/noarch::pygments-2.15.1-pyhd8ed1ab_0
  pyjwt              conda-forge/noarch::pyjwt-2.7.0-pyhd8ed1ab_0
  pynacl             conda-forge/osx-64::pynacl-1.5.0-py310h90acd4f_2
  pyopenssl          conda-forge/noarch::pyopenssl-23.2.0-pyhd8ed1ab_1
  python-dateutil    conda-forge/noarch::python-dateutil-2.8.2-pyhd8ed1ab_0
  python_abi         conda-forge/osx-64::python_abi-3.10-3_cp310
  pyyaml             conda-forge/osx-64::pyyaml-6.0-py310h90acd4f_5
  requests-oauthlib  conda-forge/noarch::requests-oauthlib-1.3.1-pyhd8ed1ab_0
  tabulate           conda-forge/noarch::tabulate-0.8.2-py_0
  yaml               conda-forge/osx-64::yaml-0.2.5-h0d85af4_2
conda install -c conda-forge azure-identity
  azure-identity     conda-forge/noarch::azure-identity-1.12.0-pyhd8ed1ab_0
  msal               conda-forge/noarch::msal-1.22.0-pyhd8ed1ab_0
  msal_extensions    conda-forge/noarch::msal_extensions-0.3.0-pyh9f0ad1d_0
conda install -c conda-forge azure-storage
  azure-storage      conda-forge/osx-64::azure-storage-0.36.0-py310h2ec42d9_1004
The following NEW packages will be INSTALLED:
  boto3              conda-forge/noarch::boto3-1.26.155-pyhd8ed1ab_0
  botocore           conda-forge/noarch::botocore-1.29.155-pyhd8ed1ab_0
  brotlipy           conda-forge/osx-64::brotlipy-0.7.0-py310h90acd4f_1005
  s3transfer         conda-forge/noarch::s3transfer-0.6.1-pyhd8ed1ab_0
The following packages will be DOWNGRADED:
  urllib3                                2.0.3-pyhd8ed1ab_0 --> 1.26.15-pyhd8ed1ab_0
conda install -c conda-forge boto3
  boto3              conda-forge/noarch::boto3-1.26.157-pyhd8ed1ab_0
  botocore           conda-forge/noarch::botocore-1.29.157-pyhd8ed1ab_0
  brotlipy           conda-forge/osx-64::brotlipy-0.7.0-py39ha30fb19_1005
  jmespath           conda-forge/noarch::jmespath-1.0.1-pyhd8ed1ab_0
  python-dateutil    conda-forge/noarch::python-dateutil-2.8.2-pyhd8ed1ab_0
  s3transfer         conda-forge/noarch::s3transfer-0.6.1-pyhd8ed1ab_0
  urllib3                                2.0.3-pyhd8ed1ab_0 --> 1.26.15-pyhd8ed1ab_0
conda install -c conda-forge click
  click              conda-forge/noarch::click-8.1.3-unix_pyhd8ed1ab_2
pip3 install datetime
Successfully installed datetime-5.1 pytz-2023.3 zope.interface-6.0
conda install -c conda-forge flask
  flask              conda-forge/noarch::flask-2.3.2-pyhd8ed1ab_0
  importlib-metadata conda-forge/noarch::importlib-metadata-6.6.0-pyha770c72_0
  itsdangerous       conda-forge/noarch::itsdangerous-2.1.2-pyhd8ed1ab_0
  jinja2             conda-forge/noarch::jinja2-3.1.2-pyhd8ed1ab_1
  markupsafe         conda-forge/osx-64::markupsafe-2.1.3-py310h6729b98_0
  werkzeug           conda-forge/noarch::werkzeug-2.3.6-pyhd8ed1ab_0
  zipp               conda-forge/noarch::zipp-3.15.0-pyhd8ed1ab_0
conda install -c conda-forge google-auth
  aiohttp            conda-forge/osx-64::aiohttp-3.8.4-py310h6729b98_1
  aiosignal          conda-forge/noarch::aiosignal-1.3.1-pyhd8ed1ab_0
  async-timeout      conda-forge/noarch::async-timeout-4.0.2-pyhd8ed1ab_0
  attrs              conda-forge/noarch::attrs-23.1.0-pyh71513ae_1
  cachetools         conda-forge/noarch::cachetools-5.3.0-pyhd8ed1ab_0
  frozenlist         conda-forge/osx-64::frozenlist-1.3.3-py310h90acd4f_0
  google-auth        conda-forge/noarch::google-auth-2.20.0-pyh1a96a4e_0
  multidict          conda-forge/osx-64::multidict-6.0.4-py310h90acd4f_0
  pyasn1             conda-forge/noarch::pyasn1-0.4.8-py_0
  pyasn1-modules     conda-forge/noarch::pyasn1-modules-0.2.7-py_0
  pyu2f              conda-forge/noarch::pyu2f-0.1.5-pyhd8ed1ab_0
  rsa                conda-forge/noarch::rsa-4.9-pyhd8ed1ab_0
  yarl               conda-forge/osx-64::yarl-1.9.2-py310h6729b98_0
conda install -c conda-forge google-cloud-core
  c-ares             conda-forge/osx-64::c-ares-1.19.1-h0dc2134_0
  google-api-core    conda-forge/noarch::google-api-core-2.11.1-pyhd8ed1ab_0
  google-cloud-core  conda-forge/noarch::google-cloud-core-2.3.2-pyhd8ed1ab_0
  googleapis-common~ conda-forge/noarch::googleapis-common-protos-1.59.1-pyhd8ed1ab_0
  grpcio             conda-forge/osx-64::grpcio-1.55.1-py310hd8379ad_1
  libabseil          conda-forge/osx-64::libabseil-20230125.2-cxx17_h000cb23_2
  libcxx             conda-forge/osx-64::libcxx-16.0.6-hd57cbcb_0
  libgrpc            conda-forge/osx-64::libgrpc-1.55.1-h73e6b18_1
  libprotobuf        conda-forge/osx-64::libprotobuf-4.23.2-h5feb325_5
  protobuf           conda-forge/osx-64::protobuf-4.23.2-py310h4e8a696_1
  re2                conda-forge/osx-64::re2-2023.03.02-h096449b_0
conda install -c conda-forge google-cloud-vision
  google-api-core-g~ conda-forge/noarch::google-api-core-grpc-2.11.1-hd8ed1ab_0
  google-cloud-visi~ conda-forge/noarch::google-cloud-vision-3.4.2-pyhd8ed1ab_0
  grpcio-status      conda-forge/noarch::grpcio-status-1.54.2-pyhd8ed1ab_0
  proto-plus         conda-forge/noarch::proto-plus-1.22.2-pyhd8ed1ab_0
conda install -c conda-forge hvac
  hvac               conda-forge/noarch::hvac-0.11.2-pyhd8ed1ab_0
conda install -c conda-forge keyring
  importlib_metadata conda-forge/noarch::importlib_metadata-6.6.0-hd8ed1ab_0
  jaraco.classes     conda-forge/noarch::jaraco.classes-3.2.3-pyhd8ed1ab_0
  keyring            conda-forge/osx-64::keyring-23.13.1-py310h2ec42d9_0
  more-itertools     conda-forge/noarch::more-itertools-9.1.0-pyhd8ed1ab_0
conda install -c conda-forge pathlib
  pathlib            conda-forge/osx-64::pathlib-1.0.1-py310h2ec42d9_7
conda install -c conda-forge pytz
  pytz               conda-forge/noarch::pytz-2023.3-pyhd8ed1ab_0
conda install -c conda-forge redis
  redis              pkgs/main/osx-64::redis-5.0.3-h1de35cc_0
conda install -c conda-forge textblob
  joblib             conda-forge/noarch::joblib-1.2.0-pyhd8ed1ab_0
  nltk               conda-forge/noarch::nltk-3.8.1-pyhd8ed1ab_0
  regex              conda-forge/osx-64::regex-2023.6.3-py310h6729b98_0
  textblob           conda-forge/noarch::textblob-0.15.3-py_0
  tqdm               conda-forge/noarch::tqdm-4.65.0-pyhd8ed1ab_1
conda install -c conda-forge time
  time               conda-forge/osx-64::time-1.8-h01d97ff_0
conda install python-dotenv
  python-dotenv      conda-forge/noarch::python-dotenv-1.0.0-pyhd8ed1ab_0
conda install oauth2client
  httplib2           conda-forge/noarch::httplib2-0.22.0-pyhd8ed1ab_0
  oauth2client       conda-forge/noarch::oauth2client-4.1.3-py_0
  pyparsing          conda-forge/noarch::pyparsing-3.1.0-pyhd8ed1ab_0
 conda install -c conda-forge psutil
  psutil             conda-forge/osx-64::psutil-5.9.5-py310h90acd4f_0
pip3 install redis
  Using cached redis-4.5.5-py3-none-any.whl (240 kB)
IMPORTANT: All the above are done just once to estabblish the requirements.txt file, which conda can use to download dependencies in the future.
-
Confirm what packages have been installed:
conda list
-
If Conda does not find a library it displays:
Solving environment: unsuccessful initial attempt using frozen solve. Retrying with flexible solve.
Collecting package metadata (repodata.json): /
So use pip3 install instead.
ERROR: Could not find a version that satisfies the requirement base64 (from versions: none)
ERROR: No matching distribution found for base64
-
When it’s time, update conda:
conda update -n base -c defaults conda
-
If you within an environment, first deactivate it:
conda deactivate
-
To remove an environment named (such as “training”):
conda remove --name "$CONDA_ENV_NAME" --all
-
Verify:
See https://github.com/Azure/azure-functions-python-library
> az --version
azure-cli                         2.49.0

core                              2.49.0
telemetry                          1.0.8

Extensions:
azure-devops                      0.18.0
azure-iot                        0.10.14
timeseriesinsights                 0.2.1

Dependencies:
msal                              1.20.0
azure-mgmt-resource               22.0.0

Python location '/usr/local/Cellar/azure-cli/2.49.0/libexec/bin/python'
Extensions directory '/Users/johndoe/.azure/cliextensions'

Python (Darwin) 3.10.11 (main, Apr  7 2023, 07:31:31) [Clang 14.0.0 (clang-1400.0.29.202)]

Legal docs and information: aka.ms/AzureCliLegal

Your CLI is up-to-date.
-
List what versions of compilers/interpreters are available for Linux & Windows on Azure:
az webapp list-runtimes
{
  "linux": [
"DOTNETCORE:7.0",
"DOTNETCORE:6.0",
"NODE:18-lts",
"NODE:16-lts",
"NODE:14-lts",
"PYTHON:3.11",
"PYTHON:3.10",
"PYTHON:3.9",
"PYTHON:3.8",
"PYTHON:3.7",
"PHP:8.2",
"PHP:8.1",
"PHP:8.0",
"RUBY:2.7",
"JAVA:17-java17",
"JAVA:11-java11",
"JAVA:8-jre8",
"JBOSSEAP:7-java11",
"JBOSSEAP:7-java8",
"TOMCAT:10.0-java17",
"TOMCAT:10.0-java11",
"TOMCAT:10.0-jre8",
"TOMCAT:9.0-java17",
"TOMCAT:9.0-java11",
"TOMCAT:9.0-jre8",
"TOMCAT:8.5-java11",
"TOMCAT:8.5-jre8",
"GO:1.19"
  ],
  "windows": [
"dotnet:7",
"dotnet:6",
"ASPNET:V4.8",
"ASPNET:V3.5",
"NODE:18LTS",
"NODE:16LTS",
"NODE:14LTS",
"java:1.8:Java SE:8",
"java:11:Java SE:11",
"java:17:Java SE:17",
"java:1.8:TOMCAT:10.0",
"java:11:TOMCAT:10.0",
"java:17:TOMCAT:10.0",
"java:1.8:TOMCAT:9.0",
"java:11:TOMCAT:9.0",
"java:17:TOMCAT:9.0",
"java:1.8:TOMCAT:8.5",
"java:11:TOMCAT:8.5",
"java:17:TOMCAT:8.5"
  ]
}
References:
- Python run Azure Functions (rather than C#)
Manual setup actions
-
In a terminal, change OS permissions to enable execute:
chmod +x python-samples.sh
chmod +x python-samples.py
-
To execute the script, instead of:
python python-samples.pyy
NOTE: This line at the top of python-samples.py
#!/usr/bin/env python3
enables execution as a file using this command:
./python-samples.py
The above needs to be done only once on each computer.
Edit .env file
Use your favorite text editor (such as VSCode) to edit file python-samples.env</strong>.
There are two types of variables defined in the .env file:
- Configuration setting strings
- Feature flags, usually True/False boolean values
Feature flags program code references to determine whether each feature is executed during a particular run.
- use_… controls whether a capability is setup
- run_… controls whether a capability is invoked
- show_… controls whether output is displayed
Sections of code (and their feature flags)
Initialization:
- Set metadata about this program
- Import libraries (in alphabetical order)
- Capture pgm start date/time
- Define utilities for printing
- Utilities for managing data storage folders and files
- Obtain run control data from .env file (in the user’s $HOME folder) 8: Load .env values or hard-coded default values (in order of code)
- Parse arguments that control program operation
- Default Feature flag settings (in order of code)
- Localize/translate text to the specified locale
- Local machine in-memory SQL database SQLLite
Levels of control specification
The program precedence of override:
- Prompts of the user from inside the running program (such as for Zip Code) overrides
- parameter specifications at run-time, which overrides
- key text retrieved from OS Keyring, which overrides
- what is retrieved from Azure, AWS, GCP, HashiCorp Vault, which overrides
- what is specified in persistent environment (.env) file, which overrides
- what is (can safely be) hard-coded in program code, which overides
- what is obtained from the operating system.
Run it already
-
Set permisssion to make the program runnable:
chmod +x python-samples.py
-
Run the program
./python-samples.py
show_print_samples
If you have show_print_samples enabled, you should see lines with different colors instead of this:
***  show_print_samples
***  FAIL: sample fail
***  sample error
***  sample warning
***  TODO: sample task to do
***  sample info
***  sample verbose
***  sample trace
***  SECRET:  1234...............................
I show sample outputs together so you can learn to differentiate the different colors, which are likely to look different on each developer’s Terminal window due to customizations.
There is a flag to control whether each type of message is displayed:
- show_heading is underlined to differentiate output from different functions and sections of code
- show_fatal to display conditions where the program must abruptly stop
- show_todo to display to developers caveats and fixes necessary
- show_error to display data which should be fixed
- show_warning to display concerns not severe enough to stop processing
- show_info to display information users would be interested in
- show_verbose to display more detailed data to users
- show_trace eminated from within processing functions
These flags have a default of True, to display output.
PROTIP: Some programmers prefer to not code shows of values, and instead dynamically set IDE breakpoints to view values. But I prefer to show so that during runs there is a historical record of what has occurred, for troubleshooting perhaps months after the run.
show_env
If you have show_env enabled, you should see metadata about conditions of the run. This is helpful for troubleshooting perhaps months after the run.
***  show during initialization
***  platform_system=Darwin
***  my_os_platform=macOS
***  my_os_version=22.5.0
***  my_os_process=73426
***  my_platform_node=Wilsons-MacBook-Pro-2.local
***  my_os_uname=posix.uname_result(sysname='Darwin', nodename='Wilsons-MacBook-Pro-2.local', release='22.5.0', version='Darwin Kernel Version 22.5.0: Mon Apr 24 20:51:50 PDT 2023; root:xnu-8796.121.2~5/RELEASE_X86_64', machine='x86_64')
***  pwuid_shell=/bin/zsh
***  pwuid_gid=20 (process group ID number)
***  pwuid_uid=501 (process user ID number)
***  pwuid_name=wilsonmar
***  pwuid_dir=/Users/wilsonmar
***  user_home_dir_path=/Users/wilsonmar
***  this_pgm_name=python-samples.py
***  this_pgm_last_commit=python-samples.py 0.3.7 gcp_login from gcpinfo.sh
***  this_pgm_os_path=/Users/wilsonmar/github-wilsonmar/python-samples/python-samples.py
***  site_packages_path=/Users/wilsonmar/miniconda3/envs/py3k/lib/python3.8/site-packages
***  this_pgm_last_modified_epoch=1686772574.9863806
***  this_pgm_last_modified_datetime=2023-06-14 13:56:14.986381 (local time)
***  python_ver=3.8.12
***  python_version=3.8.12 | packaged by conda-forge | (default, Sep 29 2021, 19:44:33) [Clang 11.1.0 ]
***  python_version_info=sys.version_info(major=3, minor=8, micro=12, releaselevel='final', serial=0)
***  venv at /Users/wilsonmar/miniconda3/envs/py3k
Python version in conda venv
Of special interest is the version of Python.
The shell script to prepare conditions follow the advice of this well-respected website. I have a more detailed explanation in my article about installing Python.
So the python-samples.sh script includes this command:
conda config --add channels conda-forge
conda config --set channel_priority strict
PROTIP: We do not have pyenv installed because conda is used to control what versions of Python are installed.
-
Google’s examples state that Python 3.10 is required. So the python-samples.sh script includes this command:
conda install python=3.10
CAUTION: Conda can take several hours to “solve” environments.
A more secure Footprint
PROTIP: In today’s hostile internet, we do not recommend installing anaconda because, although convenient, its massive number of libraries would inevitably have one that is malicious. The Miniconda installed only contains the bare minimum, leaving it up to you to install additional conda components.
In the shell file, instead of using pip or pip3 we install Python libraries using:
conda install numpy
requirements.txt
The requirements.txt contains a list of specific versions of each Python library referenced by import statements within the Python program code.
-
REMEMBER: When you update the program, create a new requirements.txt</tt> file to specify current versions:
conda ???
REMEMBER: Add, commit, and push the update along with changed Python code (as a set).
show_config
If you have show_config enabled, you should see metadata about settings to configure how the run is controlled.
***  show_config:
***  env_file=python-samples.env
PROTIP: The program is coded to ???
Most use and run flags have a default of False, to NOT use/run.
Imports
The text below assumes that you’ve familiar with the technical background at my https://wilsonmar.github.io/python-install/
Imports are always put at the top of the file, just after any module comments and docstrings, and before module globals and constants. – PEP 8.
PEP8 also asks that imports be grouped in this order:
A. Standard library imports (Python’s built-in modules)
B. Related third party imports.
C. Local application/library-specific imports
Reasons for following it:
- Utilities will raise an error if it’s not followed.
- Programmers are used to doing it this way.
- It avoids errors where imports are done before being used.
-
Imports can be used by several functions. So having them inside functions would repeat import with each invocation, which is unnecessary overhead. Module importing is fast, but not instant. (between 0.2 and 1 second).
PROTIP: This program runs a timer to identify how much time was taken.
- A long list of imports gives a basis for judging whether the program file is “too heavy”.
Reasons for not following:
-
The list of imports in code is not where we look anymore mow that utilities are run to generate SBOMs used to look up vulnerabilities by individual package.
PROTIP: Imports in this program are sorted alphabetically to make it easier to find.
-
The application starts faster if modules are imported only when needed. Importing a module both loads the contents and creates a namespace containing the contents.
References:
- https://realpython.com/python-import/
- https://towardsdatascience.com/understanding-python-imports-init-py-and-pythonpath-once-and-for-all-4c5249ab6355
Conda or venv?
Conda packages include Python libraries (NumPy or matplotlib), C libraries (libjpeg), and executables (like C compilers, and even the Python interpreter itself). The purpose:
- Portability across operating systems: Instead of installing Python in three different ways on Linux, macOS, and Windows, you can use the same environment.yml on all three.
Reproducibility: It’s possible to pin almost the whole stack, from the Python interpreter upwards.
Consistent configuration: You don’t need to install system packages and Python packages in two different ways; (almost) everything can go in one file, the environment.yml.
Packages in Conda may have gone through some additional vetting than just being in pypi.org?
There are multiple package repositories in channel Conda-Forge. https://conda-forge.org/
https://pythonspeed.com/articles/conda-vs-pip/
If the conda env is “py39”
conda install -c conda-forge folium puts the package in:
./miniconda3/envs/[name env]/lib/python3.9/site-packages/folium
pip install folium (with a conda env activated), puts the package in:
./miniconda3/lib/python3.9/site-packages/folium
Other
PROTIP: Notes are added above each import on whether it was found by Conda & pip venv.
When I tried to make use of Python 3.10, Conda does not have these packages:
- locale
requirements.txt are at the package level.
NOTE: all Python imports are from pypi.org. For example, python-dotenv is drawn from:
- https://pypi.org/project/python-dotenv/
-
Internal or external Python modules need to be specified for their classes, functions, and methods to be referenced.
import unittest
from safe_module import package, function, class
Utilities:
- https://pyup.io tracks thousands of Python packages for vulnerabilities and makes pull requests to your codebase automatically when there are updates.
- Bandit is static linter which alerts developers to common security issues in code.
- Chef InSpec audits installed packages and their versions.
- Pysa is static analyzer, open sourced by Facebook (Meta).
- sqreen.com (until its purchase by Datadog) checks each application for packages with malicious code and checks for legitimate packages with known problems or outdated versions.
Known security issues have been found in Pickle & cPickle for its serialization from representation on disk or over the network interface, because constructors and methods contain executable code. For example, website cookies have a reduce method that can be modified to contain malicious code. A better approach would be to use json.loads() or yaml_safe_load().
To verify payload integrity using cryptographic signatures, use pycryptodome. Don’t use PyCrypto because the project hasn’t been since Jun 20, 2014 and no security update has been released to fix vulnerability CVE-2013-7459.
There have been a number of Trojan horse cases from malicious code in Python packages, specifically PyPi. Moreover, some were not detected for a year.
pythonsecurity.org, an OWASP project aimed at creating a security-hardened version of Python, explains security concerns in modules and functions (from 2014). Other lists: * https://packetstormsecurity.com/files/tags/python/ * https://codehandbook.org/secure-coding-in-python/ * https://www.whitesourcesoftware.com/vulnerability-database/
OWSAP had (until 2015) a curated list of Python libraries for security applications.
There are two types of import paths in Python: absolute and relative.
Absolute imports specifies the path of the resource to be imported using its full path from the project’s root folder.
from package1 import module1
from package1.module2 import function1
Relative import specifies the resource to be imported relative to the current location of the project the folder of the import statement. There are two types of relative imports: implicit and explicit.
from .some_module import some_class
from ..some_package import some_function
Implicit relative imports have been removed in Python 3 because if the module specified is found in the system path, it will be imported with vulnerabilities. If the malicious module is found before the real module it will be imported and could be used to exploit applications that has it in their dependency tree. If a malicious module specified is found in the system path, it will be imported into your program.
LinkedIn.com video course by Ronnie Sheer
Parameters in Click Framework (not Argparse)
This program uses the Click framework (by the prolific Armin Ronacher) to present and process command-line parameters.
This is instead of argparse that comes with Python itself.
Deploy ML Model Titanic dataset on GCP
https://learning.oreilly.com/library/view/productionizing-ai-how/9781484288177/ by Barry Walsh
https://learning.oreilly.com/library/view/productionizing-ai-how/9781484288177/html/527966_1_En_9_Chapter.xhtml
-
Create a project on GCP https://console.cloud.google.com
-
Create an app using App Engine at the link below: https://console.cloud.google.com/appengine
-
Start GCP cloud shell and connect to the project
-
Clone (in Cloud Shell) the sample model at the GitHub link below:
https://github.com/opeyemibami/deployment-of-titanic-on-google-cloud
-
Initialize gcloud in the project directory by running gcloud init.
-
Deploy the app following the steps in the link below:
https://heartbeat.comet.ml/deploying-machine-learning-models-on-google-cloud-platform-gcp-7b1ff8140144
-
Download Postman Desktop version from the link below: www.postman.com/downloads/
Date and Time Handling
There are several modules which handle date, time, timezones, etc.:
- date – Manipulate just date ( Month, day, year)
- time – Time independent of the day (Hour, minute, second, microsecond)
- datetime – Combination of time and date (Month, day, year, hour, second, microsecond)
- timedelta — A duration of time used for manipulating dates
- tzinfo — An abstract class for dealing with at https://www.iana.org/time-zones”>time zones
-
see https://www.wikiwand.com/en/List_of_tz_database_time_zones 2012 Best Current Practice for Maintaining the Time Zone (TZ) Database is by a group of volunteers. Geographical boundaries in the form of coordinate sets are not part of the tz database, but boundaries are published in the form of vector polygon shapefiles. Using these vector polygons, one can determine, for each place on the globe, the tz database zone in which it is located.
- Use the time Module to Convert Epoch to Datetime in Python
- Use the datetime Module to Convert Epoch to Datetime in Python
datetime.datetime is a subclass of datetime.date.
Location-based data processing
Each country is assigned a specific block of IP addresses for use within that country. Services such as Netflix block services based on IP address. So some users send traffic through VPN gateways in various countries to mask their origin.
Each country not only have its own language, it also has a different way to display date and time.
Various programs maintain a table of 110 countries:
- https://gist.github.com/mlconnor/1887156 .csv needs Palestine and Bangladesh
- https://gist.github.com/mlconnor/1878290 is a Java program to use the csv file.
The issue with a table by country is that there are several country identifier codes:
- ISO 3166 Country Code (“USA”) used by Windows
- ISO639-2 Country Code (“US”) used by Linux
Information associated with each country:
- ISO 3166 Language Codes (“eng” or “spa” for Spanish)
- ISO639-2 Lang
- Currency code
- Telephone prefix
The preferred Date/Time format is based on LOCALE (language within country).
TODO: To determine data format, this program does a lookup of IP Address to obtain the country code. It then retrieves a country_info.csv file to do a lookup based on the MY_COUNTRY two-letter code.
LOCALE
PROTIP: LOCALE has different values on Windows vs. Linux and other systems:
if sys.platform == 'win32':
    locale.setlocale(locale.LC_ALL, 'rus_rus')  # ISO3166
else:
    locale.setlocale(locale.LC_ALL, 'ru_RU.UTF-8')  # ISO639-2 country and language
print(datetime.date.today().strftime("%B %Y"))
PROTIP: To format various locales cleanly without changing your OS locale, use an external package:
- Babel package http://babel.pocoo.org/en/latest/dates.html
- Arrow package https://arrow.readthedocs.io/en/latest/
Babel:
from datetime import date, datetime, time
from babel.dates import format_date, format_datetime, format_time
d = date(2007, 4, 1)
format_date(d, locale='en')     # u'Apr 1, 2007'
format_date(d, locale='de_DE')  # u'01.04.2007'
https://unicode-org.github.io/icu/userguide/format_parse/datetime/
TODO: With Unicode:
locale.setlocale(locale.LC_ALL, lang)
format_ = datetime.datetime.today().strftime('%a, %x %X')
format_u = format_.decode(locale.getlocale()[1])
- Bulgarian пет, 14.11.2014 г. 11:21:10 ч.
- Czech pá, 14.11.2014 11:21:10
- Danish fr, 14-11-2014 11:21:10
- German Fr, 14.11.2014 11:21:10
- Greek Παρ, 14/11/2014 11:21:10 πμ
- English Fri, 11/14/2014 11:21:10 AM
- Spanish vie, 14/11/2014 11:21:10
- Estonian R, 14.11.2014 11:21:10
- Finnish pe, 14.11.2014 11:21:10
- French ven., 14/11/2014 11:21:10
- Croatian pet, 14.11.2014. 11:21:10
- Hungarian P, 2014.11.14. 11:21:10
- Italian ven, 14/11/2014 11:21:10
- Lithuanian Pn, 2014.11.14 11:21:10
- Latvian pk, 2014.11.14. 11:21:10
- Dutch vr, 14-11-2014 11:21:10
- Norwegian fr, 14.11.2014 11:21:10
- Polish Pt, 2014-11-14 11:21:10
- Portuguese sex, 14/11/2014 11:21:10
- Romanian V, 14.11.2014 11:21:10
- Russian Пт, 14.11.2014 11:21:10
- Slovak pi, 14. 11. 2014 11:21:10
- Slovenian pet, 14.11.2014 11:21:10
- Swedish fr, 2014-11-14 11:21:10
- Turkish Cum, 14.11.2014 11:21:10
- Chinese 周五, 2014/11/14 11:21:10
Sample for import contain something like:
class TestMakingChange(unittest.TestCase):

    def setUp(self):
        self.american_coins = [25, 10, 5, 1]
        self.random_coins = [10, 6, 1]

        self.testcases = [(self.american_coins, 1, 1), (self.american_coins, 6, 2), (self.american_coins, 47, 5), (
            self.random_coins, 1, 1), (self.random_coins, 8, 3), (self.random_coins, 11, 2), (self.random_coins, 12, 2)]
Block comments
CODING CONVENTION: Block comments about the program as a whole and each function defined.
“Dunder” variables
At the top of the program file I added metadata about the file:
__repository__ = "https://github.com/wilsonmar/python-samples"
__author__ = "Wilson Mar"
__copyright__ = "See the file LICENSE for copyright and license info"
__license__ = "See the file LICENSE for copyright and license info"
__linkedin__ = "https://linkedin.com/in/WilsonMar"
__version__ = "0.0.58"  # change on every push - Semver.org format per PEP440
Variables defined with double underlines are commonly called “dunder” variables.
import datetime
print(dir(datetime))
yields attributes:
['MAXYEAR', 'MINYEAR', '__builtins__', '__cached__', '__doc__', '__file__', '__loader__', '__name__', '__package__', '__spec__', '_divide_and_round', 'date', 'datetime', 'datetime_CAPI', 'time', 'timedelta', 'timezone', 'tzinfo']
1. Import of Libraries
CODING CONVENTION: In our program imports are listesd in alphabetical order to make them easier to find. Most IDEs would detect when you don’t have an imported coded.
SECURITY CONSIDERATION: Generally, minimize the number of external dependencies to a small number of trusted ones from Microsoft, Amazon, etc.
Quit/Exit Program
Whenever a program runs in Python, the site module is automatically loaded into memory. So it does not need to be imported before issuing its quit() and exit() functions which raise a SystemExit exception to exit the program.
Because quit() works with the interactive interpreter, they should not be used in production code.
Also not recommended is using os._exit() method of the os module which exits a process without calling any cleanup handlers or flushing stdio buffers, which is not a very graceful.
PROTIP: The recommended way to exit production code is to use sys.exit() which also raises a SystemExit exception when executed:
import sys
print("exiting the program")
print(sys.exit())
2. Define starting time and default global values
- https://pythonguides.com/python-epoch-to-datetime/ provides examples of how to convert from one date format to any other.
This would be the first command:
- start_epoch_time = time.time()
Notice that to avoid confusion, only one timestamp is captured. epoch time is obtained, then reformatted to datetime:
# start_datetime = _datetime.datetime.now()
CAUTION: This code is “naive” and not timezone aware. The time is relative to local time only.
ALTERNATIVE: For timezone-aware (rather than naive) datetime, use arrow library: see https://arrow.readthedocs.io/en/latest/
- import arrow
start_epoch_time = time_start=arrow.now()
Sleep
To pause/suspend the calling thread’s execution for a specified number of seconds:
import time
time.sleep(1.5)       # seconds
time.sleep(400/1000)  # milliseconds
Pause execution
CAUTION: To pause program execution until the user does not press any key, but this method only works on Windows, so wrap the command:
import os
os.system("pause")
To pause program execution for user input, in Python 3:
name = input("Please enter your name: ")
print("Name:", name)
Back in Python 2:
name = raw_input("Please enter your name: ")
print("Name:", name)
Threading Timer
Alternately, set a Timer to wait for a specific time before calling a thread that calls a function:
from threading import Timer
def nextfunction():
    print("Next function is called!")
...
t = Timer(0.5, nextfunction)
t.start()
3. Parse arguments that control program operation
Since python-samples.py was written to be used as the starting point for building other programs, it has a large scope of features coded.
- The IP Address is obtained using the requests library.
- Geolocation information based on IP address is obtained using an API usig the urllib2 library.
Included in the code are conversions of dates, floats, and formatting floats.
https://learnpython.com/blog/9-best-python-online-resources-start-learning/
Show or not
Additionally, our custom print statements make use of global variables:
show_warning = True    # -wx  Don't display warning
show_info = True       # -qq  Display app's informational status and results for end-users
show_heading = True    # -q  Don't display step headings before attempting actions
show_verbose = True    # -v  Display technical program run conditions
show_trace = True      # -vv Display responses from API calls for debugging code
Verbosity flags
The above sample reflects these default verbosity variables, which can be changed in the code:
| Output | variable | enable | disable |
|---|---|---|---|
| what needs attention | show_warning | -sw default | -swx |
| headings at start of each section executed | show_heading | -sh default | -shx |
| informational output (such as Lotto numbers) | show_info | -si default | -six |
| intermediate calculations | show_verbose | -sv default | -svx |
| debugging | show_trace | -stv | -stx default |
The output above are issued in order of execution, explained below.
TODO: A “dev” and “prod” mode which establishes whole sets of switches.
4. Define utilities for printing (in color), logging, etc.
Printing in Color
Different colors in print output on CLI Terminal make it clear what type of information is being convayed:
- Red for failure conditions
- Yellow for warnings
- Green or White for normal information (in BOLD type)
There are external libraries (such as colorama) to enable coding to incorporate colors:
- print(colored('Hello, World!', 'green', 'on_red'))
However, PROTIP: We prefer not to type names of colors (such as “GREEN”) in app code because in the future we may want to change the color scheme within changing every print() line of code. Different font codes are needed in dark backgrounds than in white backgrounds.
Ideally, we would specify text to print using a custom function that automatically incorporates the appropriate colors in the output:
print_info("Buy {widgets_to_buy} widgets")
print_warning("Free disk space on {disk_id} low: {disk_pct_free}%")
print_fail("Code {some_code} not recognized in program.")
# FIXME: Pull in text_in containing {}.
Internally the print_info() function would use statements that is the equivalent of:
- print("*** %s %s=%s" % (my_os_platform, localize_blob("version"), platform.mac_ver()[0]),end=" ")
print("%s process ID=%s" % ( my_os_name, os.getpid() ))
PROTIP: The ,end=” “ at the end of the first statement removes the line break (new line) normally issued by Python print() statements.
PROTIP: Defining statics in a class requires each to be referenced with the class name, which provides context about what that static is used for.
So rather than coding colors in every print statement, such as this:
- from colorama import Fore, Back, Style
- from termcolor import colored
Logging
PROTIP: Per RFC 5848, append log entries with the identity of intermediary handlers along the log custody chain.
7.2. Local in-memory SQLLite database = use_sqlite
Each country can be referenced using identifiers of either two or three characters (“US” or “USA”). So it would be useful to make use of a SQL database with an index to each type of identifier.
PROTIP: A SQL database locally created from within a Python program is as transitory (temporary) as the program instance itself. SQLite (C-language) runs inside the same process as the application.
WARNING: SQLite connection objects are not thread-safe, so no sharing connections between threads.
The Python sqlite3 module adheres to the Python Database API Specification v2.0 (PEP 249).
https://pynative.com/python-sqlite/
SQLCipher is an open-source library that applies to SQLite databases transparent 256-bit AES encryption (in CBC mode) for mobile devices (Swift, Java, Xamarin). In addition to a free Community BSD-license, Zetetic offers paid Commercial and Enterprise licenses which is “3-4X faster”. It makes use of OpenSSL. Users of the peewee ORM would use the sqlcipher playhouse module. Python driver
CAUTION: If data stored is sensitive, encryption of data in transit and at rest is still needed on “scratch” databases. For more persistant storage which lives to serve many different instances of a program, use a proper database established in a cloud enviornment.
The code has a way to figure out why a sqlite3 db script might not be working. Like the comments say, it uses 3 phases, checks if a path exist, checks if the path is a file, checks if that file’s header is a sqlite3 header.
References:
- https://www.youtube.com/watch?v=byHcYRpMgI4 from FreeCodeCamp.org/Codemy.com is the most through
- https://www.youtube.com/watch?v=pd-0G0MigUA
- https://www.youtube.com/watch?v=KHc2iiLEDoQ by Telusko
- https://www.youtube.com/watch?v=E7aY1XJX1og intro by Bryan Cafferky
- https://python-course.eu/applications-python/sql-python.php
- https://codereview.stackexchange.com/questions/182700/python-class-to-manage-a-table-in-sqlite
- https://charlesleifer.com/blog/encrypted-sqlite-databases-with-python-and-sqlcipher/
If the database is created as part of program initiation, it would minimize the time users wait for the database to be created when needed. However, this consumes more memory.
If a connection to the database remains open, it would minimize the time users wait for a connection to be established when needed. However, this may leave the database vulnerable.
https://www.youtube.com/watch?v=byHcYRpMgI4&list=RDCMUC8butISFwT-Wl7EV0hUK0BQ&start_radio=1&rv=byHcYRpMgI4
5. Obtain run control data from .env file in the user’s $HOME folder
Code in this section is used to obtain values that control a run, such as override of the LOCALE, cloud region, zip code, and other variable specs.
Be aware of unhandled conditions in Python locale.
This is needed for testing.
The code reads a file in an “.env” file in the user’s $HOME folder because that folder is away from GitHub. That file’s name by hard-coded default is:
env_file = 'python-samples.env'
The following example of the .env file contents is not put in the code because that would trigger findings in utilities that look for secrets in code.
#MY_IP_ADDRESS=""     # override of lookup done by program
IPFIND_API_KEY="12345678-abcd-4460-a7d7-b5f6983a33c7"
#MY_COUNTRY="US"      # For use in whether to use metric
LOCALE="en_US"  # "en_EN", "ar_EG", "ja_JP", "zh_CN", "zh_TW", "hi" (Hindi), "sv_SE" #swedish
#MY_ENCODING="UTF-8"  # "ISO-8859-1"

#MY_ZIP_CODE="59041"  # use to lookup country, US state, long/lat, etc.
#MY_US_STATE="MT"
#MY_LONGITUDE = ""
#MY_LATITUDE = ""
#MY_TIMEZONE = ""
#MY_CURRENCY = ""
#MY_LANGUGES = ""

OPENWEATHERMAP_API_KEY="12345678901234567890123456789012"

AZURE_SUBSCRIPTION_ID="12345678901234567890123456789012"   # access to info behind this requires user credentials
AZURE_REGION="eastus"
KEY_VAULT_NAME="howdy-from-azure-eastus"

AWS_REGION="us-east-1"
AWS_CMK_DESCRIPTION="My Customer Master Key"   # this is not a secret, but still does not belong here.
KEY_ALIAS = 'alias/hands-on-cloud-kms-alias'   #

GCP_PROJECT_ID="123456etc?"
GCP_REGION="east1?"

VAULT_TOKEN=3340a910-0d87-bb50-0385-a7a3e387f2a8   # secret
VAULT_URL=http://localhost:8200

IMG_PROJECT_ROOT="$HOME"  # or "~" on macOS="/Users/wilsonmar/" or Windows: "D:\\"
IMG_PROJECT_FOLDER="Projects"
TODO: The program downloads file “python-samples.env” from GitHub to the user’s $HOME folder for reference:
Such run variables can be overridden by specifications in the program’s invocation parameters or real-time UI specification.
Some use this mechanism to retrieve API keys to services that do not ask for personal information and credit cards (such as weather apps). But storing any secret in a clear-text (unencrypted) file containing is not recommended.
CAUTION: Leaving secrets anywhere on a laptop is dangerous. One click on a malicious website and it can be stolen. It’s safer to use a cloud vault such as Amazon KMS, Azure, HashiCorp Vault after signing in.
- https://blog.gruntwork.io/a-comprehensive-guide-to-managing-secrets-in-your-terraform-code-1d586955ace1#bebe
- https://vault-cli.readthedocs.io/en/latest/discussions.html#why-not-vault-hvac-or-hvac-cli
Putting secrets in an .env file is better than putting secrets in ~/.bash_profile on macOS. See https://python-secrets.readthedocs.io/en/latest/readme.html
Localization
NOTE: For localized presentation, use these specialized functions which understands LOCALE localization : # atof (convert a string to a floating point number), # atoi (convert a string to integer), # str (formats a floating point number using the same format as the # built-in function str(float) but takes the decimal point into account).
Use Language Code Identifier (LCID) https://docs.microsoft.com/en-us/openspecs/windows_protocols/ms-lcid/a9eac961-e77d-41a6-90a5-ce1a8b0cdb9c?redirectedfrom=MSDN
my_encoding = “utf-8” # default: or “cp860” or “latin” or “ascii” “ISO-8859-1” used in SQLite.
7. Display run conditions: datetime, OS, Python version, etc.
Get = get_ipaddr
There are several ways to get the IP address addressed by the program.
Lookup Geolocation based on IP address
https://rapidapi.com/blog/ip-geolocation-api/
Online, several websites lookup geolocation (city, region (US state), country, zip/postal code, latitude, longitude, ):
- https://www.ipaddress.my/
- https://www.iplocation.net/
- https://whatismyipaddress.com/
- https://iplocation.io/
- https://www.whatismyip.com/ip-address-lookup/
- https://www.geolocation.com/ also provides the district/county name
- https://www.ip2location.com/ which also provides elevation, time zone, Weather Station, AS number for carrier.
There are several reasons the response can be not the actual physical location: - If a VPN is active. It’s whole job is to proxy traffic.
- T-Mobile routes traffic to regional locations
The code here in this program references a periodically updated file from: * https://www.melissa.com/developer/ip-locator * https://www.ip2location.com/database/ip2location for $49+/year
Among APIs cataloged at https://catalog.data.gov/dataset?q=-aapi+api+OR++res_format%3Aapi https://project-open-data.cio.gov/
At time of writing, there were 566 repositories in the github.com/googleapis account/organization:
7. Define utilities for managing data storage folders and files
7.1. Create, navigate to, and remove local working folders
8. Front-end
To obtain user input:
- PythonCard
9. Generate various calculations for hashing, encryption, etc.
Hashing is a one-way operation. Hashing works by mapping a value (such as a password) with a salt to a new, scrambled value. Ideally, there should not be a way of mapping the hashed value / password back to the original value / password.
By contrast, an encrypted value can possibly be (eventually) decrypted to its clear-text value.
So when storing passwords in databases, hashing (with a strong salt) is considered more secure than encryption and decryption (2-way operations). When a user provides a password for authentication, a hash of it is created the same way, then compared with the hash stored in the database.
https://www.python.org/dev/peps/pep-0506/
Validate each password
- Minimum 10 characters
- No all-number values
- Not Common values
Credential stuffing using credentials stolen from other websites.
Rate-limiting HTTP 403 error
Passlib
http://theautomatic.net/2020/04/28/how-to-hide-a-password-in-a-python-script/ discusses passlib, which is an external package requiring
pip install -U passlib
from passlib.context import CryptContext
Select one of several CryptContext objects obtained by an additional package:
- argon2 (with argon2_cffi package)
- bcrypt
- pbkdf2_sha256
- pbkdf2_sha512
- sha256_crypt
- sha512_crypt
The scheme used is specified in code such as:
password_in = "test_password"
...
# Create CryptContext object:
context = CryptContext(
        schemes=["pbkdf2_sha256"],
        default="pbkdf2_sha256",
        pbkdf2_sha256__default_rounds=50000
)
# hash password:
hashed_password = context.hash(password_in)
...
# Verify hashed password:
context.verify(password_in, hashed_password)
Creating a CryptoContext requires specifying the number of “rounds” – the number of times that a function (algorithm) runs to map a password to its hashed version. Each scheme involves several collections operations. The more rounds the more scrambling and thus more secure from brute force. More rounds also take longer to complete. Also, bcrypt and argon2 are slower to produce hashed values, and therefore, usually considered more secure.
https://github.com/python/cpython/blob/3.6/Lib/random.py
https://martinheinz.dev/blog/59 - The xkcdpass library generates strong passphrase made of words from a word/dictionary file on your system such as /usr/dict/words
Base64 Salt
A “salt” provides a random string that is appended to a password before hashing for safer storage in a database. It makes the password more random and therefore harder to guess (using rainbow tables).
Since modern computer hardware grows ever more powerful, attempt billions of hashes per second, purposely slow hash functions now need to be used for password hashing, to make it more inefficient for attackers to brute-force a password. Thus a timer on salt hash calculations.
There is the passlib library.
-
To create a random string of n bytes that is Base64 encoded for use in URLs:
secrets.token_urlsafe([nbytes=None])
n=16
token_urlsafe(16)
    # 'Drmhze6EPcv0fN_81Bj-nA'
On average each n byte results in approximately 1.3 characters. If nbytes is None or not supplied, a reasonable default is used.
Python 3.6 introduced a secrets module, which “provides access to the most secure source of randomness that your operating system provides.”
https://docs.python.org/3.6/library/secrets.html
secrets.token_bytes([nbytes=None])
Return a random byte string containing nbytes number of bytes. If nbytes is None or not supplied, a reasonable default is used.

>>> token_bytes(16)
b'\xebr\x17D*t\xae\xd4\xe3S\xb6\xe2\xebP1\x8b'
secrets.token_hex([nbytes=None])
Return a random text string, in hexadecimal. The string has nbytes random bytes, each byte converted to two hex digits. If nbytes is None or not supplied, a reasonable default is used.

>>> token_hex(16)
'f9bf78b9a18ce6d46a0cd2b0b86df9da'
In order to generate some cryptographically secure numbers, you can call secrets.randbelow().
secrets.randbelow()
n=10
rand_num = secrets.randbelow(n)  # returns a number between 0 and n.
print(f'*** {rand_num} ')

# from random import SystemRandom
cryptogen = SystemRandom()
[cryptogen.randrange(3) for i in range(20)] # random ints in range(3)
    # [2, 2, 2, 2, 1, 2, 1, 2, 1, 0, 0, 1, 1, 0, 0, 2, 0, 0, 0, 0]
[cryptogen.random() for i in range(3)]  # random floats in [0., 1.)
   # [0.2710009745425236, 0.016722063038868695, 0.8207742461236148]
The above replaces use of standard pseudo-random generators os.urandom() which are not suitable for security/cryptographic purposes.
salt_size = 32
password_salt = os.urandom(salt_size).hex()  # returns a byte string
   # m\xd4\x94\x00x7\xbe\x04\xa2R'
map(ord, os.urandom(10))
   # [65, 120, 218, 135, 66, 134, 141, 140, 178, 25]
References:
- https://tonyarcieri.com/4-fatal-flaws-in-deterministic-password-managers
Encryption and decryption
See https://www.geeksforgeeks.org/encrypt-and-decrypt-files-using-python/
-
Import required module:
import cryptography
from cryptography.fernet import Fernet
-
Enable generation of a key to encrpyt our password:
key = Fernet.generate_key()
-
Perform encryption (Hashing is recommended because it is generally more secure):
enc = f.encrypt(b"test_password")
Note that the password needs to be passed in bytes.
-
Decrpyt the encrypted password using the decrypt method.
f.decrypt(enc)
9.4. Generate a fibonacci number recursion = gen_fibonacci
The Fibonacci sequence is a sequence of numbers which is the sum of the two preceding numbers.
fibonacci_memoized_cache = {0: 0, 1: 1, 2: 2, 3: 3, 4: 5, 5: 8, 6: 13, 7: 21, 8: 34, 9: 55, 10: 89, 11: 144, 12: 233, 13: 377, 14: 610}
This was identified by Leonardo Fibonacci (1175 A.D. - 1250 A.D). BTW Fibonacci found that the quotient of the adjacent number has a proportion, roughly 1.6180, or its inverse 0.6180, also called the “golden ratio”.
An example is how quickly rabbits reproduce, starting with one pair of rabbits (male and female). It takes one month until they can mate. At the end of the second month the female gives birth to a new pair of rabbits, etc.
There are actually practical uses for Fibonacci sequences in financial technical analysis. Specifically, retracements:
- https://www.investopedia.com/articles/technical/04/033104.asp
- https://www.investopedia.com/terms/f/fibonaccilines.asp
- https://www.investopedia.com/terms/f/fibonaccitimezones.asp
https://python-course.eu/applications-python/fibonacci-to-music-score.php
def fibonacci_recursive(n):
        """Calculate using brute-force across all - for O(n) time complexity
        This is also called a "naive" implementation.
        """
        if n in {0, 1, 2}:   # the first 3 result values (0, 1, 2) are the same as the request value.
            return n
        # recursive = function calls itself:
        return fibonacci_recursive(n - 1) + fibonacci_recursive(n - 2)
The “Dynamic programming” approach is to start out with a cache of pre-calculated solutions from previous runs, such as the 15th number being 610:
The increase in Fibonucci return values grow exponentially.
def fibonacci_memoized(n):
      """Calculate using saved lookup - for O(1) time complexity"""
      if n in fibonacci_memoized_cache:  # Base case
            return fibonacci_memoized_cache[n]
      # else:  # add entry in fibonacci_memoized_cache and save to Redis/Kafka (see below)
         # TODO: If Redis is not found, issue API calls to create it.
      fibonacci_memoized_cache[n] = fibonacci_recursive(n - 1) + fibonacci_recursive(n - 2)
      return fibonacci_memoized_cache[n]
Based on bottom_up_fib(n) in https://github.com/samgh/DynamicProgrammingEbook/blob/main/python/Fibonacci.py
External caching in Azure Cache for Redis
In production systems that does this kind of workload, consider the use of a Redis/Kafka in-memory cache so that several instances can be running to calculate numbers. In such a case, we want each instance to contribute to the pool of numbers.
In the memoized example, the program first checks if the value is already in the local cache. If not, it gets the whole cache set from Redis Cache.
If it’s not in the Redis Cache, calculate the new Fibonacii value and update the local cache and also adds an entry to the Redis Cache. TODO: Add the cache set to long-term storage (SQL)?
“Caching typically works well with data that is immutable or that changes infrequently. Examples include reference information such as product and pricing information in an e-commerce application, or shared static resources that are costly to construct.” – See https://docs.microsoft.com/en-us/azure/architecture/best-practices/caching
Redis would allow duplicates of a program to run in several locations, and update a central momoized_cache. The example here uses Azure Cache for Redis, a highly-scalable SaaS service fully-managed by Azure based on the open-source Redis in-memory key-value database.
It helps to write to a more permanent location (in a JSON database) because in order to scale down a Cache, a new instance needs to be setup. When cached data expires, it’s removed from the cache, and the application must retrieve the data from the original data store (it can put the newly fetched information back into cache).
Redis is designed to run inside a trusted environment that can be accessed only by trusted clients.
The Premium plan is needed for access inside a private virtual network.
https://azure.microsoft.com/en-us/services/cache/ is the marketing home page
Pricing begins at $0.022/hour ($0.528/day or $15.84/month) for the “C0” Basic service to a maximum of 256 client connections referencing up to 250 MB in the US.
For enterprise plans, the DNS name ends with …westus2.redisenterprise.cache.azure.net
To view values in Azure, there is no GUI. So install the Azure Cache for Visual Studio Code (in Preview as of Dec. 2021).
- Click on the link above.
- Within VSCode, click “Install” and other steps described.
- Press Shift+Control+A or, on the left menu, click the icon with three dots if you don’t see the Azure icon.
- In the CACHES section, click “Sign in to Azure”. This is equivalent to “az login”.
- Close the browser tab opened automatically.
- Select an Azure Subscription.
- Click on the “>” next to the cache to expand it.
- Click the filter icon to the right of a “DB” line.
- Type in “*” (asterisk) for all key values and press Enter. In the Fibonucci memoization example, 15, 16, 17, etc. would appear under the “DB”.
- Click on each key for another tab to appear.
References:
- https://docs.microsoft.com/en-us/azure/azure-cache-for-redis/cache-python-get-started
- https://docs.microsoft.com/en-us/azure/azure-cache-for-redis/
- https://docs.microsoft.com/en-us/azure/azure-cache-for-redis/cache-overview
9.9 Make change using Dynamic Programming = make_change
This “Coin Changing problem” was a PDF: Codility challenge to returning change for the smallest number of bills/coins,
The call to the function is:
make_change_dynamic(34,[100,50,20,10,5,1])
The function’s signature:
def make_change_dynamic(k, C):
    # k is the amount you want back in bills/change
    # C is an array of the denominations of the currency, such as [100,50,20,10,5,1]
    # (assuming there is an unlimited amount of each bill/coin available)
    n = len(C)  # the number of items in array C
    print(f'*** make_change_dynamic: k={k} C="{C}" n={n} ')
In the array of denominations, the largest denomination appears first because we want to give out the largest bills first. For example, if k is 200, we would give back two $100 bills, not a stack of $1 bills. This is called the “greedy” method.
The plainly (“brute force”) approach is to iteratively pick the largest denomination from array C (such as 100), with each turn. It returns an array of each denomination given back as change = [20, 10, 1, 1, 1, 1]
*** make_change_dynamic: C="[100, 50, 20, 10, 5, 1]" n=6
*** turn=0 k=34 to start
*** turn=1 k=14 after denom=20 change
*** turn=2 k=4 after denom=10 change
*** turn=3 k=3 after denom=1 change
*** turn=4 k=2 after denom=1 change
*** turn=5 k=1 after denom=1 change
*** turn=6 k=0 after denom=1 change
*** After 6 turns, k=0 remaining ...
*** make_change: change_back=[20, 10, 1, 1, 1, 1]
The assumption is an infinite number of each denomination (kind of bill/coin).
Make Change Dynamically
To optimize, we can reduce the number of “turns” and the extent of repetitive lookup of denominations. The brute-force solution does not consider those aspects.
Dynamic Programming involves breaking down a problem into solutions to sub-problems. There is a “top-down” and “bottom-up” approach to solving the problem.
PROTIP: Many of the “Dynamic Programming” solutions (such as Fibonacci) involves caching and then referencing a pre-calculated array (using memoization) instead of prepeatedly performing calculations interrively. In other words, dynamic programming generally uses more memory space to take less time.
A “bottom-up” (iterative) solution is often faster than a “top-down” (recursive) approach, but not always.
add that to output list “dp” for what is given out, and subtract it from “k”.
The global value going into the function is MAX_INT which defines an arbitrary maximum number of bills/coins for use the empty state starting point.
    dp = [0] + [MAX_INT] * k   # array of bills given out
    for i in xrange(1, n + 1):   #
       for j in xrange(C[i - 1], k + 1):
           dp[j] = min(dp[j - C[i - 1]] + 1, dp[j])
    return dp
to use Space Complexity from O(n · k) to O(k).
References:
- VIDEO by Stephen O’Neil of codebelts.com
-
VIDEO: mnemonic “FAST” method by Sam Gavis-Hughson at Byte by Byte, author of DP (Dynamic Programming) ebook for Python.
- VIDEO by Derrick Sherrill
- VIDEO by “Back to Back SWE https://b2bswe.co/change-making-problem
- VIDEO by Kevin Naughton Jr.
- VIDEO by NeetCode: 1
- VIDEO by NeetCode: 2
- VIDEO by CS Dojo from Facebook
- VIDEO: by Paul
- VIDEO by Hackerrank on the Coin Change problem using Memoization and DP
- https://www.hackerrank.com/domains/python
9.10 Fill knapsack = fill_knapsack
The “Knapsack” optimization challenge has many uses in the real world. (Except for Mary Poppins), every knapsack can carry a limited amount of weight. Given a value and weight for each item, how do we maximize the amount of value carried in the knapsack?
items = {(w:2, v:6), (w:2, v:10), (w:3, v:12)}  # w=weight, v=value
max weight = 5
knapsack(items, max weight) = 22  # maximum
Right away, limit our combinations that are less than the maximum weight.
The brute-force approach is to examine every possible combination of items in the knapsack. Ignore items too heavy to fill remaining space in the bag.
This Knapsack problem is the quintessential example of a dynamic programming problem. Other dynamic programming problems are variations of it.
References:
- VIDEO: ?
- https://youtu.be/Mjy4hd2xgrs
- https://www.youtube.com/watch?v=xOlhR_2QCXY
- VIDEO: by Back to Back SWE
9.8. Convert between Roman numerals & decimal = process_romans
Sample output:
*** process_romans: roman_to_int: MMXXI => 2021
*** process_romans: int_to_roman: 2021 ==> MMXXI
Alternative: Pure Python GeoIP API = https://github.com/appliedsec/pygeoip
12. Obtain Zip Code to retrieve Weather info = lookup_zipinfo
PROTIP: Users don’t have to provide information which can be looked up based in an API given a Zip Code: ‘country’: ‘United States’, ‘country abbreviation’: ‘US’, … ‘state’: ‘Montana’, ‘state abbreviation’: ‘MT’
# NOTE: Several place names can be associated with a Zip Code.
# TODO: Loop through a list of zip codes.
# TODO: Repeat every x minutes for updates
# TODO: Save results (in CSV or SQLite DB) for time series analysis

# Alternately:
# city_name="New York"
# city_name = input("Enter city name : ")
There is a function for code to obtain zip code. It uses a potentially problematic infinite while loop to request user input. We also use the built-in input() function because we want to minimize use of 3rd-party libraries such as PyInputPlus. See https://medium.com/code-85/the-best-way-to-request-user-input-in-python-e072a808dc82 The PyInputPlus module has a module for each data type – inputStr(), inputNum(), inputMenu() – to apply appropriate edits to input entered.
13. Retrieve Weather info from zip code or lat/long = show_weather
Weather reports report on the Kelvin scale, which is converted to Celcius and Fahrenheit scales by the program.
NOTE: The Fahrenheit metric is shown in parentheses because there are very few nations in the world that use the Fahrenheit unit of temperature.
Countries and territories that use the Fahrenheit scale are:
- United States
- Bahamas
- Cayman Islands
- Liberia
- Palau
- The Federated States of Micronesia
- Marshall Islands
A few nations use BOTH Fahrenheit and Celsius:
- Antigua and Barbuda
- Saint Kitts and Nevis
- British Virgin Islands
- Montserrat
- Belize
- Bermuda
- Turks and Caicos
All other nations in the world exclusively use the Celsius scale when measuring temperature. The Celsius is named for the Swedish astronomer Anders Celsius, who developed a scale in 1742. The 100-degree range of the Celsius scale – from freezing at 0 degrees to boiling at 100 (at sea level)– made the Celsius scale a natural fit to be a part of the metric system.
The equivalent of a Celsius temperature of 21.1 is 70 on the Fahrenheit scale.
BTW The Fahrenheit scale was initially proposed in 1724 by the Dutch-German-Polish physicist physicist Daniel Gabriel Fahrenheit. The scale is defined by two fixed points: 32 °F (the freezing point of water) and 212 °F (the boiling point of water).
There are other API’s for weather and other services:
- https://www.timeanddate.com/services/api/ has moon phases as well as astronomical positions like altitude, distance, and azimuth for every location on Earth.
- https://api.tidesandcurrents.noaa.gov/api/prod/
- https://tidesandcurrents.noaa.gov/moon_phases.shtml?year=2021&data_type=monDec
14. Retrieve secrets from local OS Keyring = use_keyring
Based on https://martinheinz.dev/blog/59
A Python application can use the operating system’s Keyring utility that stores secure credentials in an encrypted file within your $HOME directory.
The Keyvault file (by default) uses your user account login password for encryption, so it gets automatically unlocked when you login and you therefore don’t have worry about extra password.
In the code, we start by checking location of keyring config file, which is the place where you can make some configuration adjustments if needed.
We then check the active keyring and proceed with adding a password into it. Each entry has 3 attributes - service, username and password, where service acts as a namespace, which in this case would be a name of an application. To create and retrieve an entry, we can just use set_password and get_password respectively. In addition to that, also get_credential can be used - it returns a credential object which has an attribute for username and password.
14. Retrieve secrets from GitHub Action = use_github_actions
use_azure
VIDEO:
https://azure.com/sdk rerouts to
https://azure.microsoft.com/en-us/downloads/
Get the SDK,
https://aka.ms/azsdk/python/docs for Documentation, and
https://github.com/azure/azure-sdk-for-python which references
https://learn.microsoft.com/en-us/azure/developer/python
https://github.com/Azure/azure-functions-python-library Triggers / Bindings : HTTP, Blob, Queue, Timer, Cosmos DB, Event Grid, Event Hubs and Service Bus
- Python Worker Programming Model, Triggers & Bindings
- Linux Base Docker Images
- Runtime Script Host & Language Extensibility
- VSCode VSCode Extension for Azure Functions
- Core Tools Command Line Interface for Local Development
- Portal User Interface or Experience Issue
- Templates Code Issues with Creation Template
https://github.com/Azure/azure-functions-python-library/tree/dev/azure/functions
Retrieve secrets from Azure Key Vault
https://journeyofthegeek.com/2020/06/30/azure-key-vault-certificates-and-pythons-oh-my/
https://docs.microsoft.com/en-us/python/api/overview/azure/identity-readme?view=azure-python
Azure Active Directory identity library
https://github.com/rjmax/ArmExamples/tree/master/keyvaultexamples from 2015.
from azure.identity import DefaultAzureCredential
- https://pypi.org/project/azure-identity/
from azure.keyvault.secrets import SecretClient:
- see https://pypi.python.org/pypi/azure-keyvault-secrets
-
If you already have a key vault, make sure it allows template deployments:
az keyvault update --name ExampleVault --enabled-for-template-deployment true
-
Create a new key vault and add a secret:
az group create --name ExampleGroup --location centralus
az keyvault create \
--name ExampleVault \
--resource-group ExampleGroup \
--location centralus \
--enabled-for-template-deployment true
az keyvault secret set --vault-name ExampleVault --name "ExamplePassword" --value "hVFkk965BuUv"
-
As the owner of the key vault, you automatically have access to create secrets. If you need to let another user create secrets:
az keyvault set-policy \
  --upn user-principal-name \
  --name ExampleVault \
  --secret-permissions set delete get list
-
The user who deploys the template must have the Microsoft.KeyVault/vaults/deploy/action permission for the scope of the resource group and key vault, Replace “00000000-0000-0000-0000-000000000000” with the subscription ID:
{ "Name": "Key Vault resource manager template deployment operator", "IsCustom": true, "Description": "Lets you deploy a resource manager template with the access to the secrets in the Key Vault.", "Actions": [ "Microsoft.KeyVault/vaults/deploy/action" ], "NotActions": [], "DataActions": [], "NotDataActions": [], "AssignableScopes": [ "/subscriptions/00000000-0000-0000-0000-000000000000" ] } -
Assign the custom role above to the user on the resource group level:
az role definition create --role-definition "path-to-role-file"
az role assignment create \
  --role "Key Vault resource manager template deployment operator" \
  --assignee user-principal-name \
  --resource-group ExampleGroup
References:
- https://www.youtube.com/watch?v=BErur8WwAsg - Getting Started with Microsoft Azure in Python by Jie Jenn
- https://www.youtube.com/watch?v=k2VYcYS3EIA
-
https://www.youtube.com/watch?v=gC4wmZf7dAI - Enable Zero Trust with Azure AD PIM (Privileged Identity Management) and Azure Lighthouse for MSPs (Managed Service Providers) Azure Friday
Azure SDK for Python:
- Alternative: see my blog about Pulumi
- https://docs.microsoft.com/en-us/azure/developer/python/azure-sdk-install?tabs=pip
- https://www.youtube.com/watch?v=4xoJLCFP4_4 - Introducing the Azure SDK for Python
-
https://www.youtube.com/watch?v=WER5X_zm6Aw - An introduction to the unified Azure SDK Azure Friday - https://www.youtube.com/watch?v=5oIcT0HCrvI - Microsoft Azure Overview: The Azure Python SDK by Sigma Coding
- https://www.youtube.com/watch?v=_qQq6oHskUQ - Machine Learning and Python with Microsoft Azure - http://aka.ms/azuredevstreams by https://twitch.tv/enceladosaurus
References:
- https://docs.microsoft.com/en-us/python/api/overview/azure/keyvault-keys-readme?view=azure-python
- https://docs.microsoft.com/en-us/azure/azure-resource-manager/templates/key-vault-parameter?tabs=azure-cli
14.2 Use Azure Redis Cache for Memoization
“Dynamic Programming” is the strategy of reducing the “Time Complexity” of code by increasing “Storage Complexity”. Practically, rather than repeating a computation, lookup the results of the computation stored on disk or memory.
The example here is comparing the time needed to calculate Fibonacci numbers recursively versus lookup in an Azure Redis Cache instance.
14.5 Microsoft Graph API
https://devblogs.microsoft.com/microsoft365dev/new-python-quick-start-and-samples-for-microsoft-graph/
use_aws
- Install packages needed by running python-samples.sh
- Setup IDE VSCode for Python
- Look at sample code
- Run with default values by running python-samples.py
- Customize
Install packages
I’ve made it easier for you to install Python in AWS cloud:
In python-samples.sh, setup Python programs to access AWS by installing:
- boto3 included in the Boto3 library for Python.
- awscrt => AWS CRT (Common RunTime) SDK at https://github.com/awslabs/aws-crt-python
The code is a submodule:
git clone https://github.com/awslabs/aws-crt-python.git
cd aws-crt-python
git submodule update --init
# conda or python3 -m pip install .
  conda install botocore
  botocore                            1.29.155-pyhd8ed1ab_0 --> 1.29.161-pyhd8ed1ab_0

  conda install awscrt
  aws-c-auth         conda-forge/osx-64::aws-c-auth-0.6.28-hb1389d5_5
  aws-c-cal          conda-forge/osx-64::aws-c-cal-0.5.27-h1a35643_0
  aws-c-common       conda-forge/osx-64::aws-c-common-0.8.20-h0dc2134_0
  aws-c-compression  conda-forge/osx-64::aws-c-compression-0.2.17-h0ead7ca_0
  aws-c-event-stream conda-forge/osx-64::aws-c-event-stream-0.3.0-h3f5e915_6
  aws-c-http         conda-forge/osx-64::aws-c-http-0.7.8-h7d0dcbb_4
  aws-c-io           conda-forge/osx-64::aws-c-io-0.13.26-ha48b2be_0
  aws-c-mqtt         conda-forge/osx-64::aws-c-mqtt-0.8.13-h4efb563_2
  aws-c-s3           conda-forge/osx-64::aws-c-s3-0.3.4-hefe73a3_5
  aws-c-sdkutils     conda-forge/osx-64::aws-c-sdkutils-0.1.10-h0ead7ca_0
  aws-checksums      conda-forge/osx-64::aws-checksums-0.1.16-h0ead7ca_0
  awscrt             conda-forge/osx-64::awscrt-0.16.21-py310hacc69eb_0

  conda install s3transfer

  conda install jmespath

  conda install python-dateutil

  conda install six

  conda install urllib3


### Setup IDE VSCode for Python

Setup VSCode https://github.com/awslabs/aws-crt-python/blob/main/guides/dev/README.md

https://towardsdatascience.com/introducing-icecream-never-use-print-to-debug-your-python-code-again-d8f2e5719f8a

The Azure tools extension for Visual Studio Code (find it under VS Code extensions and click install).

https://azure.github.io/azure-sdk-for-python/

https://www.cisin.com/coffee-break/technology/why-exactly-should-you-choose-python-development-on-microsoft-azure.html
Python sample code
Sandip Das’s VIDEO:
https://github.com/sd031/python-for-cloud
https://medium.com/enefitit/tutorial-of-python-in-azure-app-service-ed348887dfc0
AWS Documentation
Our use case is to (securely) read and write objects in/out of S3 buckets.
Tutorial of Python in Azure App Service Publish your code as a production-ready app without the traditional server setup
Versioned developer docs:
https://azure.github.io/azure-sdk-for-python/
Public developer docs at:
https://docs.microsoft.com/python/azure/
AWS KMS
To generate, encrypt, and decrypt data keys that can be used outside of AWS KMS, AWS uses two types of CMK (Customer Master Key) to encrypt up to 4KB of data:
-
Symmetric CMK: 256-bit symmetric key that never leaves AWS KMS unencrypted.
-
Asymmetric CMK: AWS KMS generates a key pair where the private key never leaves AWS KMS unencrypted.
References:
- https://www.youtube.com/watch?v=RL-mQWFWJcM any Boto3
- https://www.learnaws.org/2021/02/20/aws-kms-boto3-guide/
- https://towardsdatascience.com/python-and-aws-ssm-parameter-store-7f0e211bb91e AWS Systems Manager’s Parameter Store
- https://aws.amazon.com/blogs/security/how-to-securely-provide-database-credentials-to-lambda-functions-by-using-aws-secrets-manager/
- https://boto3.amazonaws.com/v1/documentation/api/latest/guide/quickstart.html
- https://towardsdatascience.com/python-and-aws-ssm-parameter-store-7f0e211bb91e
- Rotating IAM Keys using Boto3
- stop/start EC2 instances on a scheduled basis to save cost using AWS Lambda and CloudWatch
- Python Essentials for AWS Cloud Developers May 2023 by Serkan Sakinmaz explores APIs for AWS Lambda, EC2, Elastic Beanstalk, and S3. Plus using NoSQL and DynamoDB.
Using GCP (Google Cloud Platform) = use_gcp
Background information about Google’s APIs relevant to all programming languages (such as professional certifications) is in my article at
https://wilsonmar.github.io/gcp
Under the googleapis organization on GitHub is https://github.com/googleapis/google-cloud-python#libraries which provides (at time of this writing) 113 stable and preview versions of Python client code to Google’s many services APIs to make REST API and gRPC calls.
Why Python? For one, Google’s Policy Troubleshooter accessed from API & CLI handles more complex issues than the GUI: How to use
Since many servers have ICMP ping commands disabled to block malicious scanners, a Python program can periodically reach an IP address to see if it’s active, and measure round-trip speed. Those measurements can be saved for availability trending over time.
References:
- Step-by-step guide Python - Google Cloud Function by ForDevelopers
- Python API intro by Python 360
GCP Login and Authentication
https://readthedocs.org/projects/google-auth/downloads/pdf/latest/ google-auth-readthedocs-io-en-latest
Google Cloud Endpoints
https://cloud.google.com/endpoints
Simply upload an OpenAPI specification and deploy Google’s containerized proxy.
Google Cloud Endpoints let you manage and control access to your own APIs. You can keep APIs private or share them with partners, and you can monitor API usage.
Portal: https://console.cloud.google.com/endpoints/v2
Choose within a matrix Cloud Endpoints uses one of two open source proxy to provide API management.
- Extensible Service Proxy V1 (ESP) for App Engine v1 flexible env
-
Extensible Service Proxy V2 (ESPv2) must be used by Cloud Functions, Cloud Run. AppEnginev2,
one of these Google Cloud Endpoints options to manage/host API and the type of communications protocol your API uses: - Cloud Endpoints Frameworks for the legacy App Engine v1 standard environment using legacy Java 8 and Python 2.7 runtimes.
- Cloud Endpoints for OpenAPI with Cloud Functions must use ESPv2.
- Cloud Endpoints for gRPC can be used by Compute Engine, GKE, etc. through either ESP or ESPv2.
Cloud Endpoints for OpenAPI
The OpenAPI Initiative is an industry-wide effort to standardize the description of REST APIs. Endpoints supports APIs that are described using version 2.0 of the OpenAPI Specification (formerly the Swagger Specification). You describe the surface of your API in a JSON or YAML file (referred to as an OpenAPI document). You can implement your API using any publicly available REST framework such as Django or Jersey. If you are unfamiliar with the OpenAPI Specification, see OpenAPI overview.
-
Create a new project so it can be deleted later.
https://console.cloud.google.com/cloud-resource-manager
IMPORTANT: Have “Enpoints” in the name because the script enables services when it finds that specific text.
-
Click “SELECT PROJECT” associated with the new project at the right panel.
-
Enable billing for the project. Endpoints charges by its calls to Service Control. Each API call processed by the Extensible Service Proxy (ESP) or the Cloud Endpoints Frameworks are reported as a tracked operation by the Service Control API and is listed as line item for Service Control on your bill.
-
Open Cloud Shell or use your macOS after installing Google Cloud CLI.
-
In the CLI, specify the project variables:
export MY_GCP_ACCOUNT_EMAIL=johndoe@gmail.com
export MY_GCP_CONFIG_NAME=???  # default
export MY_GCP_PROJECT_NUMBER=123456789012
export MY_GCP_PROJECT_NAME="cp100"
export MY_GCP_PROJECT_ID=cp100-1094
export MY_GCP_LOCATION=US
export MY_GCP_REGION=us-central1
export MY_GCP_ZONE=us-central1-c
-
Prepare the Terminal: Copy and paste this to run on your Terminal/shell:
sh -c "$(curl -fsSL https://raw.githubusercontent.com/wilsonmar/gcp-samples/main/gcpinfo.sh)"
It runs “gcloud components update”, etc.
RESPONSE: Operation “operations/acat.p2-…” finished successfully.
It recognizes “Endpoints” in the Project Name, it would enable services related to it:
gcloud services enable servicemanagement.googleapis.com
gcloud services enable servicecontrol.googleapis.com
gcloud services enable endpoints.googleapis.com
-
Get the scripts for Enpoints:
git clone https://github.com/GoogleCloudPlatform/endpoints-quickstart --depth 1
cd endpoints-quickstart
CAUTION: At the top of the repo is this notice:
This repository has been archived by the owner on Jan 13, 2023. It is now read-only.
If you prefer to fork before:
git remote add upstream https://github.com/GoogleCloudPlatform/endpoints-quickstart -
Edit the pre-configured OpenAPI specification file openapi.yaml at the root of the repo:
code openapi.yaml
The API has a single request: “Get the airport name for a given IATA code.”
The API expects one query parameter, iataCode, that is set to a valid IATA airport code such as SEA or JFK. For example:
-
Change “YOUR-PROJECT-ID” to the value of $MY_GCP_PROJECT_ID, such as “ninth-matter-388922”:
NOTE: For some reason I am getting an error using the sed (Stream Editor) Linux utility to replace host: “YOUR-PROJECT-ID.appspot.com” with your $MY_GCP_PROJECT_ID See https://www.cyberciti.biz/faq/how-to-use-sed-to-find-and-replace-text-in-files-in-linux-unix-shell/
sed -i 's/YOUR-PROJECT-ID/ninth-matter-388922/g' openapi.yaml
Endpoints use the host field in the OpenAPI configuration file to identify the service.
-
Run:
cd scripts
chmod +x deploy_api.sh
./deploy_api.sh
Within the script, source util.sh runs the shell file.
RESPONSE:
Deploying ../openapi.yaml...
gcloud endpoints services deploy ../openapi.yaml
Waiting for async operation operations/services.ninth-matter-388922.appspot.com-0 to complete...
Waiting for async operation operations/serviceConfigs.ninth-matter-388922.appspot.com:a9bab33c-b504-4e16-b405-3b4c98555fad to complete...
Operation finished successfully. The following command can describe the Operation details:
gcloud endpoints operations describe operations/serviceConfigs.ninth-matter-388922.appspot.com:a9bab33c-b504-4e16-b405-3b4c98555fad

Waiting for async operation operations/rollouts.ninth-matter-388922.appspot.com:fc24e8b3-9a52-4f32-a0b7-c520092f8049 to complete...
Operation finished successfully. The following command can describe the Operation details:
gcloud endpoints operations describe operations/rollouts.ninth-matter-388922.appspot.com:fc24e8b3-9a52-4f32-a0b7-c520092f8049

Enabling service [ninth-matter-388922.appspot.com] on project [ninth-matter-388922]...
Operation "operations/acat.p2-429760259033-2f8518bb-d9a8-47d0-9f99-035fb2d14f84" finished successfully.
The script then deploys the OpenAPI configuration to Service Management by using the command:
gcloud endpoints services deploy openapi.yaml
As it creates and configures the service, Service Management outputs information to the Google Cloud console. You can safely ignore the warnings about the paths in openapi.yaml not requiring an API key.
-
On successful completion, a line similar to this should displays the service configuration ID and the service name:
Service Configuration [2023-06-05r0] uploaded for service [ninth-matter-388922.appspot.com]

To manage your API, go to: https://console.cloud.google.com/endpoints/api/ninth-matter-388922.appspot.com/overview?project=ninth-matter-388922
-
Copy the URL and switch to a browser to go to it, such as:
https://console.cloud.google.com/endpoints/api/ninth-matter-388922.appspot.com/overview?project=ninth-matter-388922)
-
Back at the Terminal, see Enpoints at:
https://console.cloud.google.com/endpoints/v2
-
Enable your Enpoints service:
gcloud services enable “$MY_GCP_PROJECT_ID.appspot.com”
-
Send requests to it by running the following script:
./query_api.sh SFO
The script echoes the curl command that it uses to send a request to the API, and then displays the result. The output is:
curl "https://example-project.appspot.com/airportName?iataCode=SFO"
RESPONSE: San Francisco International Airport
-
Set paramter expected by the script:
export project_id="$MY_GCP_PROJECT_ID"
-
To avoid error: FIXME: declare: usage: declare [-afFirtx] [-p] [name[=value] …]
comment out:
# declare -A codes
-
I’ve posted a question about the above on the “Google Serverless General Dev” chat group (there’s no “Endpoints” group): https://www.googlecloudcommunity.com/gc/forums/filteredbylabelpage/board-id/cloud_serverless/label-name/App%2520Dev%2520General
Formerly:
https://groups.google.com/g/google-cloud-endpoints -
Generate traffic to track API activity:
chmod +x generate_traffic.sh
./generate_traffic.sh
RESPONSE:
This command will exit automatically in 300 seconds.
Generating traffic to https://ninth-matter-388922.appspot.com/airportName?iataCode=SFO...
Press Ctrl-C to stop.
Served 25 requests.
Served 50 requests.
Served 75 requests.
Served 100 requests.
Served 125 requests.
Served 150 requests.
Served 175 requests.
-
If you don’t want to wait the whole 5 minutes, stop the run by pressing control+C.
HTTP status codes received from https://ninth-matter-388922.appspot.com/airportName?iataCode=SFO:
404: 216
-
Delete the project created for this back at the Resource Manager:
https://console.cloud.google.com/cloud-resource-manager
Using an OpenAPI Specification or one of Google’s API frameworks, Cloud Endpoints gives you the tools you need for API development and provides insight with Cloud Logging, Cloud Monitoring, and Cloud Trace.
Control who has access to your API and validate every call with JSON Web Tokens and Google API keys. Integration with Auth0 and Firebase Authentication lets you identify the users of your web or mobile application.
-
https://cloud.google.com/blog/products/gcp/google-cloud-endpoints-now-ga-a-fast-scalable-api-gateway
- https://cloud.google.com/endpoints/pricing
- https://cloud.google.com/endpoints/pricing-and-quotas
-
https://cloud.google.com/products/calculator
- https://cloud.google.com/endpoints/docs
- https://cloud.google.com/endpoints/docs/deploy-api
- https://cloud.google.com/endpoints/docs/openapi/how-to
Run from GCP (Google Cloud Platform) Cloud Shell = use_gcp
See https://wilsonmar.github.io/gcp
-
In a browser (such as Google Chrome), click on this URL navigate to one of your projects:
https://console.cloud.google.com/
Alternately, to go directly to the Compute:
https://console.developers.google.com/apis/api/compute
-
Navigate to the Google project you would like to use.
-
Use Google’s ADC (Application Default Credentials) to automatically finds credentials based on the application environment. With ADC, code can run in either a development or production environment without changing how your application authenticates to Google Cloud services and APIs. GOOGLE_APPLICATION_CREDENTIALS environment variable
gcloud auth application-default login
The above command causes the default browser to open for you to designate an account and provide its password.
-
If you are running inside a Google Compute Engine virtual machine, VIDEO: press Y. Copy the link. Switch to a another tab to paste in its address bar.
-
Choose the Google account you want to use. Click Allow. You’ll see https://cloud.google.com/sdk/auth_success
-
If you are running inside a Google Compute Engine virtual machine, VIDEO: click Copy. Switch back to the Cloud Shell. Press command+V to “Enter authorization code”.
- Click the “Activate Cloud Shell” icon at the top.
- Adjust the shell screen area by dragging its edge up.
-
PROTIP: Change the prompt from “…@cloudshell”:
-
pwd to see the folder path
-
Get the python-samples.py there by copying this command and pasting in the Cloud Shell.
git clone https://github.com/wilsonmar/python-samples.git
cd python-samples
ls
-
Open the GCP editor to edit file the enviornment configuration file:
edit python-samples.env
-
Many prefer the smoother editing experience on their local machine, then copy and paste the file’s contents into the Cloud Shell Editor.
GCP_PROJECT_ID="???"
GCP_REGION_ID="???"
GCP_ZONE_ID="???"
GCP_INSTANCE="???"
- Enable the Google service, such as the Compute Engine.
-
Run my handly shell script to download and install utilities needed:
chmod +x python-samples.sh
./python-samples.sh
The script automatically runs python-samplex.py based on the .env file.
-
Use the GUI to view your Google project.
-
Craft the command to invoke features you want:
./python-samples.py -gcp -list
Run from MacOS Terminal
-
Install gcloud on your local CLI Terminal:
pip3 install google-api-python-client
(instead of gcloud login)
References:
- https://cloud.google.com/python
- VIDEO Goole API Explorer
-
Python Cloud Client Libraries:
https://cloud.google.com/python/docs/reference at
https://github.com/googleapis/google-cloud-python
Explained
Retrieve secrets from GCP Secret Manager = get_gcp_secrets
-
https://cloud.google.com/code/docs/vscode/secret-manager
- https://cloud.google.com/docs/authentication
- https://cloud.google.com/docs/authentication#strategies
- https://cloud.google.com/docs/authentication/getting-started
- “How to create a Google Cloud Service Account and download client json file”by Jie Jenn Jul 25, 2021
GOOGLE_APPLICATION_CREDENTIALS or explicitly create credentials and re-run the application.
https://cloud.google.com/docs/authentication/production - using service accounts
https://stackoverflow.com/questions/35159967/setting-google-application-credentials-for-bigquery-python-cli
Attaching service accounts to resources for Google Cloud services is more convenient and secure than manually passing credentials. Google Cloud Client Library Application Default Credentials (ADC) automatically finds service account credentials
json-credentials-path=os.environ["GOOGLE_APPLICATION_CREDENTIALS"]
-
To create credentials to a service account setup according to https://cloud.google.com/docs/authentication/production
export GCP_PROJECT_ID="weather-454da" export GCP_SVC_ACCT_NAME="memyselfandi" gcloud iam service-accounts create "${GCP_SVC_ACCT_NAME}" --project "${GCP_PROJECT_ID}" gcloud projects add-iam-policy-binding "${GCP_PROJECT_ID}" \ --member="serviceAccount:${GCP_SVC_ACCT_NAME}@${GCP_PROJECT_ID}.iam.gserviceaccount.com" \ --role="roles/owner" # Response is list of several member serviceAccount: gcloud iam service-accounts keys create "${GCP_SVC_ACCT_NAME}.json" --iam-account="${GCP_SVC_ACCT_NAME}@${GCP_PROJECT_ID}.iam.gserviceaccount.com" # created key [3dd743379e48adb5c020de0a4ef04f0b5930fbd5] of type [json] as [wilson-svc-2112140232.json] for [wilson-svc-2112140232@weather-454da.iam.gserviceaccount.com] -
For on-going reference:
export GOOGLE_APPLICATION_CREDENTIALS="/home/user/Downloads/service-account-file.json"
CAUTION: PROTIP: Service Account Keys are like passwords. Whoever posseses one will be able to use it to login the account.
-
Rotate keys. Generate old keys, refer to them, delete old keys.
-
Assign Roles for Secret Manager: https://console.cloud.google.com/iam-admin/serviceaccounts?project=weather-454da&supportedpurview=project
- Secret Manager Admin
- Secret Manager Secret Accessor
- Secret Manager Secret Version Adder
- Secret Manager Secret Version Manager
- Secret Manager Viewer
Keyless GCP Workload Identity Federation
Workload Identity Federation (g.co/workloadidentityfederation) provides keyless authentication for service accounts used by applications services (programs rather than people) outside the GCP cloud. It replaces long-lived service account access keys with short-lived (temporary) access tokens which impersonate a service account. Vidoes:
-
“Service Account keys and impersonation” Mar 19, 2021 by Google Cloud Tech
- “Security Risks of Service Accounts in Google Cloud: How to Mitigate Them” by Out of DevOps
-
“GitHub Workflow and Workload Identity Federation” Oct 9, 2021 by Out of DevOps
- “GCP - Workload Identity Federation - Access GCS Bucket From AWS Lambda Function” Apr 30, 2021 by Cloud Monkey
- “Keyless Entry: Securely Access GCP Services From Kubernetes” (at Cloud Next Aug. ‘19) by Google Cloud Tech
-
Define values:
# Identity pool groups for least privilege and enviornment: dev, stage, prod :
gcloud_identity_pool_id="weather-identity-pool-211216"
gcloud_identity_pool_desc="???"
gcloud_identity_pool_display_name="???"
gcloud_provider_id="external-provider-1"  # such as aws, azure, AD, Okta, K8s
gcloud_issuer-uri="???"  #
gcloud_project_number="123412342341234"
gcloud_svc_acct_email="???@"
gcloud_identity_subject="???"
-
Create a Workload Identity Pool:
gcloud iam workload-identity-pools create "${gcloud_identity_pool_id}" \
--location="global" \
--description="${gcloud_identity_pool_desc}" \
--display-name="${gcloud_identity_pool_display_name}"
NOTE: Several can be created.
-
Create a one-way trust:
gcloud iam workload-identity-pools providers create-oidc "${gcloud_provider_id}" \ --workload-identity-pool="${gcloud_identity_pool_id}" \ --location="global" \ --issuer-uri="${gcloud_issuer-uri}" \ --attribute-mapping="google.subject=assertion.sub" -
Create an IAM policy for impersonation:
gcloud iam service-accounts add-iam-policy-binding "${gcloud_svc_acct_email}" \
--role roles/iam.workloadIdentityUser \
--member "principal://iam.googleapis.com/projects/${project_number}/locations \
"/global/workloadIdentityPools/${gcloud_identity_pool_id}/subject/${gcloud_identity_subject}"
Google Text-to-Speech
The engine is powered by DeepMind.
-
“Google Cloud Text-to-Speech AI API in Python - Getting Started (Part 1)” by Jie Jenn
-
https://www.youtube.com/watch?v=7tDGxUxKUAo”>
https://www.youtube.com/watch?v=lKra6E_tp5U&t=0s
“Text to Speech Converter - FREE & No Limits” by Kevin Stratvert
SECTION 17. Retrieve secrets from HashiCorp Vault
See my wilsonmar.github.io/hashicorp-vault.
Local Test instance
On Ubuntu:
-
Add the HashiCorp GPG key for response “OK”.
curl -fsSL https://apt.releases.hashicorp.com/gpg | apt-key add -
-
Add the official HashiCorp Linux repository:
apt-add-repository "deb [arch=amd64] https://apt.releases.hashicorp.com $(lsb_release -cs) main"
Get:6 https://apt.releases.hashicorp.com focal/main amd64 Packages [50.1 kB]
Fetched 59.6 kB in 1s (81.2 kB/s)
-
Update the package cache and install Vault.
apt update && apt install vault
NOTE:The package scripts prepare the vault binary to execute with memory locking capabilities with the setcap utility by adding the +ep cap_ipc_lock capabilities as described in in the Vault Configuration documentation.
-
Configure Vault with an integrated storage backend in the next challenge, and it is not recommended to use memory locking with that storage backend.
-
Remove the memory locking capabilities from the vault binary.
setcap -r /usr/bin/vault
-
Verify the installation by obtaining the vault version locally:
vault version
vault -h
-
https://www.vaultproject.io/docs/agent
setcap -r /usr/bin/vault
-
Get the URL of the HashiCorp Vault instance you’ll be using.
To use Docker Compose to run a contaiinerized Vault instance on your laptop for testing, see https://modularsystems.io/blog/securing-secrets-python-vault/
git clone https://github.com/ryanhartje/containers.git
cd containers/consul-vault/
docker-compose up -d
Alternately,
-
Add to python-samples.env, for example:
VAULT_TOKEN=3340a910-0d87-bb50-0385-a7a3e387f2a8
VAULT_URL=http://localhost:8200
PROTIP: Tokens have an associated TTL (Time to Live).
Setup Instances
-
Create a KVv2 secrets path (called “secrets”):
vault secrets enable kv-v2
-
Create a secret on the “myapp” path.
App coding for single instance
https://github.com/dmcteer/vault-ha/blob/main/vault-noha.py does not cache secrets in memory to reduce frequent requests to retrieve them nor manage TTLs inside of the application so that a secret is only requested at the time that it is expected to change.
-
Create a new AppRole auth method (called “myapp”).
-
Create and apply a policy to allow the “myapp” role to read the secret from the “myapp” path.
-
Generate a role ID and a secret ID for the “myapp” role.
These two values need to be protected (e.g. in correctly permissioned files) because anyone who can get hold of them would be able to login to Vault themselves. So wrap the token and delete files immediately after being read by your app.
-
Use AppRole to login to Vault by passing a role ID & secret ID to the application. Make the role ID and the secret ID available to the application through environment variables on the system where the application is running. This can be executed securely in production environments through the use of a trusted configuration management tool for standalone hosts, or init/sidecar processes in Kubernetes.
-
Renew the token (by the running application) while it is running.
-
Write an automated script to make calls repeateded.
-
Adjust retry timers for secret retrieval when there are no available Vault clusters. This helps to prevent applications from overwhelming the Vault service.
-
Rotate secrets using Consul https://github.com/hashicorp/consul-template
-
Setup a monitoring tool such as Splunk to ingest audit logs and build notifications about who isn’t following the method outlined above, allowing you to proactively reach out to users and help them build this resiliency into their applications.
-
Conduct chaos engineering by downing the Vault server.
High Availability
-
To improve reliability (reduce downtime) through High Availability (HA), setup an additional performance (active/active) replica cluster in a separate geographic az or region to constantly replicate data from the primary so that identical secret data exists in both places. The anticipated RTO would be a few minutes of downtime during recovery.

-
Either the load balancer or the application would need to:
- recognize when a cluster is no longer available and
- begin routing requests to a healthy cluster.
-
Set allowed CIDR ranges.
-
Use the additional 19 lines of code
https://github.com/dmcteer/vault-ha/blob/main/vault-ha.py
-
Conduct “chaos engineering”:
- Down the primary and measure the RTO time it takes for the secondary to take over
- Down the secondary and measure the time it takes to bring up a replacement instance
References:
- https://medium.com/hashicorp-engineering/coding-for-secrets-reliability-with-hashicorp-vault-2090dd8667e
-
https://www.youtube.com/watch?v=SLB_c_ayRMo - Terraform Course - Automate your AWS cloud infrastructure on freeCodeCamp.org
-
https://www.youtube.com/watch?v=-leJQ20Nu0c - HashiCorp Vault without Hassle - Eric Feliksik by TheSmartbit (2017)
- https://www.youtube.com/watch?v=YGs438aJtZg - HashiCorp Vault Azure Secrets Engine Demo
-
https://www.youtube.com/watch?v=ZWaKF-UXtx8 - HashiCorp Vault PKI Secrets Engine Demo for Certificate Management by TeKanAid
- https://www.youtube.com/watch?v=G46ovYs_9hs - CloudAcademy HashiCorp: Vault Identity
- https://fakrul.wordpress.com/2020/06/06/python-script-credentials-stored-in-hashicorp-vault/
- https://learn.hashicorp.com/tutorials/vault/static-secrets
- https://discuss.hashicorp.com/t/python-code-to-access-static-secret-to-access-snowflake-database/23059
- https://stackoverflow.com/questions/62606388/get-secrets-from-enterprise-vault-using-python
- https://www.youtube.com/watch?v=KxQVlrFy3Gc - using GitLab
16. Retrieve secrets from GCP = use_gcp
-
See my https://wilsonmar.github.com/gcp about getting an account, creating a project, and getting into https://console.cloud.google.com and Cloud Shell.
-
Edit the python-samples.env file with:
PROJECT_ID="1234etc"
-
Enable billing for project
-
Use the Cloud Shell to enable the Secret Manager API:
gcloud services enable secretmanager.googleapis.com
You should see output like this:
Operation "operations/acf.cc11852d-40af-47ad-9d59-477a12847c9e" finished successfully.
-
On your laptop, install the Secret Manager Client Library:
pip3 install --user google-cloud-secret-manager==2.5.0
-
Enter the Jupyter enviornment:
ipython
To use serverless Google Cloud Functions, specify in the requirements.txt of your Python project folder:
google-cloud-secret-manager==2.5.0
In Secret Manager, a secret is a wrapper around a collection of secret versions.
The secret stores metadata such as labels and replication, but it does not contain the actual secret.
A secret version contains the actual contents of a secret.
A secret version can be enabled, disabled, or destroyed.w
To change the contents of a secret, create a new version.
References:
-
https://wilsonmar.github.io/gcp/
-
Python on Google Cloud: https://cloud.google.com/python/
- Secret Manager: https://cloud.google.com/secret-manager/
- https://googleapis.dev/python/secretmanager/latest/index.html
-
https://googleapis.dev/python/secretmanager/1.0.0/gapic/v1/api.html
-
https://cloud.google.com/secret-manager/docs/reference/libraries#client-libraries-install-python
- Cloud Client Libraries for Python: https://googlecloudplatform.github.io/google-cloud-python/
17. Retrieve secrets from HashiCorp Vault = use_vault
https://wilsonmar.github.io/hashicorp-vault
VIDEO: How to use Python HVAC for Hashicorp Vault CRUD Operations https://github.com/jakefurlong/vault
https://www.amazon.com/Running-HashiCorp-Vault-Production-McTeer-ebook/dp/B08JJLGMZ3/
6.1 Calculte BMI using units of measure based on country = categorize_bmi
More APIs
- TODO: Authentication: see https://github.com/public-apis/public-apis#authentication
-
TODO: OpenID Connect (OIDC): A simple identity layer on top of the OAuth framework.
- TODO: Send SMS text via Twillo
-
https://hunter.io/api to find emails (25 free/month)
- TODO: Domain validator - https://developers.google.com/safe-browsing/v4
- TODO: WayBackMachine archiving https://archive.org/wayback/available?url=google.com
-
TODO: https://github.com/public-apis/public-apis#url-shorteners
- TODO: Alexa https://www.youtube.com/watch?v=j8d8PQTi6uA&list=RDCMUCdiBpPE07MZ4TfFjsNh59Nw&start_radio=1&rv=j8d8PQTi6uA&t=89
-
TODO: Google Assistant https://www.c-sharpcorner.com/article/creating-a-voice-assistant-using-python-and-its-libraries/
- TODO: Generate Random number, face: https://thispersondoesnotexist.com/
- TODO: https://bible-api.com/ (no-Auth like Lorem Ipsum text)
- TODO: https://developers.google.com/calendar/api/v3/reference/calendars
-
TODO: Currency conversion
- TODO: Twitter account: sentiment analysis (AI)
-
Picture annotation
- TODO: Flight status - https://skyscanner.github.io/slate/#api-documentation
-
TODO: UPS code lookup https://github.com/public-apis/public-apis#shopping
- Facebook apps?
”””
””” Test runs:
Multi-platform?
- on MacOS Monterey - see https://wilsonmar.github.io/apple-mac-osx-versions/
- TODO: on Windows.
- TODO: on Linux Centos, Red Hat Enterprise Linux 8
- TODO: on Linux Ubuntu
- TODO: on Linux2 within AWS
Resilient? To ensure exceptions are handled properly:
- TODO: without .env file
- TODO: without wi-fi
”””
Proof by linking hash to a blockchain
Blockchains are an unalterable chain of events with time stamps.
“Chainpoint is an open standard for creating a timestamp proof of any data, file, or series of events.” One use case is to store predictions. Another use case is are agreements such as Leases since the content is hashed and thus unalterable.
The Chainpoint Hash API Gateway from Tierion.com enables regular applications to record hashes of data in the blockchain. The data itself is kept private. Use of the Hash API is free up to 3 records per second or 1,000 records per hour.
No 3rd-party library is needed, as we use import requests and import hashlib.
BLOG:
JSON Web Token (JWT) is used for authentication to https://hashapi.tierion.com/v1/auth/token The response from https://app.pluralsight.com/guides/using-the-tierion-hash-api-with-python is good for one hour.
- https://github.com/chainpoint/chainpoint-start
- https://github.com/chainpoint/chainpoint-gateway/wiki/Gateway-HTTP-API
Asana API
Asana.com is one of the early SaaS providers of team project management software.
-
Several apps integrate with it using their API:
https://asana.com/apps
-
Specific example with how-to:
https://anvil.works/articles/using-the-asana-api
-
Their API Docs:
https://asana.com/guide/help/api/api
-
Sign up for an account. They have free ones.
https://asana.com/developers
-
On their API Explorer page, get an API key
https://developers.asana.com/explorer
-
Their OpenAPI (Swagger) specification list query perameters:
https://asana.github.io/developer_docs_prerelease/api_reference/
It’s generated using https://github.com/Asana/developer-docs https://github.com/Asana/api-explorer
-
Their Python library on GitHub:
https://github.com/Asana/python-asana
- https://developers.asana.com/docs
Verify Email
In this program is code to validate email addresses.
PROTIP: Email validation is by API calls, so can be invoked immediately by JavaScript when someone types in an email on a form.
There are several email validator API services available. They all check for fake DNS domains as well as use regex functions to check whether email addresses have accepted characters, the right length, etc.
-
https://mailboxlayer.com/product offers 30 API Requests/minute free. CAUTION: the API ACCESS KEY is part of the URL, which is unsafe:
https://apilayer.net/api/check?access_key = YOUR_ACCESS_KEY & email = support@apilayer.com
-
https://www.zerobounce.net/email-validation-pricing is free up to 100 emails per month.
-
Hunter.io offers a free monthly plan of 50 email verifications with domain searches.
- Twilio’s SendGrid service has no free level.
-
https://trumail.io/ has no free level:
{ "address": "wilsonmar@somewhere.com", "username": "wilsonmar", "domain": "gmail.com", "md5Hash": "17e996e1bbf467e0b15196ffdc185317", "suggestion": "", "validFormat": true, "deliverable": true, "fullInbox": false, "hostExists": true, "catchAll": false, "gravatar": false, "role": false, "disposable": false, "free": true } -
https://documentation.mailgun.com/en/latest/api-email-validation.html#email-validation returns HTTP 429 error if too many requests. An example of a response:
{ "address": "nonexistentemail@realdomain.com", "is_disposable_address": false, "is_role_address": false, "reason": [mailbox_does_not_exist], "result": "undeliverable", "risk": "high" }-
https://rapidapi.com/auth/sign-up?referral=/pozzad/api/email-validator-1
-
https://mailchimp.com/developer/
-
temp-email.io
Gravatar from MD5 Hash of email
Early pioneers created, for use with WordPress, a website where people can associate (register) their email address with a picture (“avatar” image) at http://gravatar.com. It’s now used by many websites.
In this program, the feature flag view_gravatar controls whether a Gravatar lookup is attempted for an email address. The API call is made after calculating from the email address an MD5 hash (such as “5f2f71a59bd9e62b0cc5fe4cd7216968”), using hexdigest within the hashlib module.
In this program, the feature is tested using an email obtained from the env file:
some_email=os.environ.get('MY_EMAIL')  # "johnsmith@example.com"
print_verbose( some_email)
get_gravatar_url( some_email )
PROTIP: Here is an example of defaults specified for a function so not every parameters needs to be specified with an argument value.
def get_gravatar_url(email, size, default, rating):
    # Commentary of this is at https://wilsonmar.github.io/python-samples#view_gravatar
    hash = hashlib.md5(email.encode('utf-8')).hexdigest()
    url = "https://secure.gravatar.com/avatar/"
    ... # Validate size, rating
    url_string = url + hash +"&size="+ str(size) +"&d="+ default +"&r="+ rating
    return url_string
Gravatar.com responds to both unencrypted HTTP and HTTPS, but a different URL is used for each.
The “print_info()” function of this program outputs a URL you can copy to paste on your browser’s Address bar to get the avatar image for the email address johnsmith@example.com:
- https://secure.gravatar.com/avatar/5f2f71a59bd9e62b0cc5fe4cd7216968

https://en.gravatar.com/site/implement/images/ explains the other parameters:
- size is the number of pixels, up to 2048px.
- rating uses a code like the ones on movies - it specifies the most “explicit” level based on the self-rating supplied whoever uploaded the image into Gravatar.com. “G” (“g”) is the default.
This program opens the default browser program with the URL returned:
import webbrowser
print_verbose("Opening web browser to view gravatar image of "+ some_email)
webbrowser.open(some_email_gravatar, new=2)
Test with another email by changing in the code the value of some_email.
TODO: Text Readability Score
https://github.com/brbcoding/Readability
Dynamic Programming
https://www.byte-by-byte.com/dpbook/
Stand-alone execution
PROTIP: Test the program running as an stand-alone executable after bundling everything into a single .exe using the py2exe.
BTW Delphi has always been the best product for producing stand-alone .EXEs for Windows. Lazarus IDE using FreePascal
Difference between two images
https://www.youtube.com/watch?v=fUfvBnREBFc&list=RDCMUCvVZ19DRSLIC2-RUOeWx8ug&index=30
96. Text to Speech file and play mp3
Google’s Text-To-Speech API
- https://cloud.google.com/text-to-speech?hl=en
- https://cloud.google.com/text-to-speech/docs/quickstart-protocol
- https://www.youtube.com/watch?v=-AzGZ_CHzJk”>Python Voice Assistant Tutorial #1 - Playing Sound with gTTS (Google Text to Speech), by Tech With Tim Aug 31, 2019
- https://www.youtube.com/watch?v=tIFEe0W0BEA by Let’s Learn About
- https://www.youtube.com/watch?v=X9rxXFjoWzg with pyttsx3 by Rishabh Narayan
- https://www.youtube.com/watch?v=_bScjMgipkk with pyttsx3 by Parwiz Forogh
- Select a GCP project
- Create a service account
- Enable Text-to-Speech
Enable project billing for Text-to-Speech.
Create and/or assign one or more service accounts to Text-to-Speech.
Download a service account credential key.
Set your authentication environment variable.
Alternately, perform audio manipulation and storing audio in a byte-sized object.
https://cloud.google.com/text-to-speech/docs/libraries
- pip install –upgrade google-cloud-texttospeech
- pip install –upgrade gtts
The gTTS function creates an object which reads the text and convert it to an audio object and mp3 audio-format file.
We can use many parameters with this function. We can reduce the speed of the output using the slow argument. The lang parameter specifies multiple languages.
Play mp3 file using the https://github.com/TaylorSMarks/playsound
Mp3 files can also be played by calling the VLC player using the VLC Python module https://wiki.videolan.org/Python_bindings
UI Libraries
The wxwidgets framework was started in 1992 in C++ for portability across Unix and Windows. It now support macOS as well. It’s free open-sourced at https://github.com/wxWidgets/wxWidgets.
Tutorial: https://zetcode.com/gui/wxwidgets/
Getting started: https://www.youtube.com/watch?v=L3IXsa9Yyr4
Native user interfaces on Windows, Macs, and Linux can be programmed in Python using https://www.wxpython.org/
Elixir after this install:
WXWIDGETS_PATH="$(brew edit wxwidgets --print-path)"
# Add the \-\-enable-compat28 flag for compatibility with Erlang's :observer
cat "$WXWIDGETS_PATH" | sed 's/args = \[/args = \["--enable-compat28",/' >> "$WXWIDGETS_PATH"
brew install wxwidgets --build-from-source
For Python: VIDEO
Coursera Google IT Automation Professional Certificate
On Coursera.com is the “Google IT Automation with Python” Professional Certificate from 2019 consists of six courses, each set over 4 weeks, using Qwiklabs. Worth it? My notes while taking it are below.
-
Using Python to Interact with the Operating System
- The official language reference may seem unintelligible to beginners. But it’s the definitive source for the most experienced devs.
- BOOK: Automate the Boring Stuff with Python includes a lot of practical programming exercises for beginners. You can refer to this content to read more about some of the things that we’ll be discussing, and get inspired with more ideas of things that can be automated.
- Installing Python 3 on MacOS with Homebrew
- Python in the Microsoft Store for Windows 10
- Installing Python 3 on Windows 10 with Chocolatey
- Python IDEs and Code Editors (Guide)
- Best Python IDEs and Code Editors
- Is it worth the time table
- Introduction to Git and GitHub
- Week 1: Introduction to Git and GitHub (Version Control)
- Week 2: Advanced Git interaction, Undoing Things, Branching and Merging,
- Week 3: Working with Remotes, Introduction to GitHub, Using a Remote Repository, Solving Conflicts
-
Week 4: Collaboration, Pull Requests, Code Reviews, Managing Projects
- validations.py
-
Troubleshooting and Debugging Techniques (by Amanda Ballas, Google Security Systems Administrator)
- od-cx/dev/urandom
- top control+C
- traffice shaping?
-
memory_profiler
- https://realpython.com/python-concurrency/
- https://hackernoon.com/threaded-asynchronous-magic-and-how-to-wield-it-bba9ed602c32
- https://www.pluralsight.com/blog/tutorials/how-to-profile-memory-usage-in-python
-
https://www.linuxjournal.com/content/troubleshooting-network-problems
- Eisenhower - Importance vs Urgent matrix
- Technical Debt = make more work for ourselves later by taking shortcuts now
-
https://blog.rescuetime.com/how-to-prioritize/
- https://simpleprogrammer.com/understanding-the-problem-domain-is-the-hardest-part-of-programming/
- https://blog.turbonomic.com/blog/on-technology/thinking-like-an-architect-understanding-failure-domains
-
https://landing.google.com/sre/sre-book/chapters/effective-troubleshooting/
- Download the file only once from the URL.
- Pre-process it so that the same calculation doesn’t need to be done over and over again. This can be done in two ways (“Dynamic Programming”).
- Create a dictionary with the start dates and then use the data in the dictionary instead of the complicated calculation.
- Sort data by start_date and then go date by date.
-
Configuration Management and the Cloud by SRE includes Deploying Puppet 6 (“the current standard”), Automation in the Cloud, Managing Cloud Instances at Scale
- https://quizlet.com/106907330/puppet-exam-questions-flash-cards/
- IaC (Infrastructure as Code) - Using a version control system to deploy and manage node configurations
- https://puppet.com/docs/puppet/latest/lang_resources.html
- https://puppet.com/blog/deploy-packages-across-your-windows-estate-with-bolt-and-chocolatey/
- Fact = A variable representing characteristics of a system
- Idempotent = An action can be performed repeatedly without changing the system after the first run
- https://en.wikipedia.org/wiki/Domain-specific_language
- http://radar.oreilly.com/2015/04/the-puppet-design-philosophy.html
- Puppet facts are stored in hashes. If we wanted to use a conditional statement to perform a specific action based on a fact value, what symbol must precede the facts variable for the Puppet DSL to recognize it?
-
1:30:00 lab - Debug Puppet
- hello-cloud.py “A simple Hello World type app which can serve on port 8000.”
Strings interned?
This provides an example of secure string handling
Decrypting and encrypting strings in Python doesn’t work because strings and Integers are interned and thus persistent.
PROTIP: Use mutable bytearray() data structures elements that can be dynamically replaced.
To be safe, to dynamically resize a data structure, create a new one, copy data, and then write over the old one. Source: http://www.ibm.com/developerworks/library/s-data.html
def paranoid_add_character_to_list(ch, l):
  """Copy l, adding a new character, ch.  Erase l.  Return the result."""
  new_list = []
  for i in range(len(l)):
    new_list.append(0)
  new_list.append(ch)
  for i in range(len(l)):
    new_list[i] = l[i]
    l[i] = 0
  return new_list
For immutable data, mark data as sensitive using the memset C function within a C module.
This is highly dependent on internal interpreter details such as: id having the same value as the object pointer, the offset of string data from the object pointer, etc. Incredibly brittle; do not recommend. On Linux:
import sys
import ctypes

def nuke(var_to_nuke):
    strlen = len(var_to_nuke)
    offset = sys.getsizeof(var_to_nuke) - strlen - 1
    ctypes.memset(id(var_to_nuke) + offset, 0, strlen)
    del var_to_nuke               # derefrencing the pointer.
http://web.archive.org/web/20100929111257/http://www.codexon.com/posts/clearing-passwords-in-memory-with-python
https://app.pluralsight.com/library/courses/python-secure-coding-playbook/table-of-contents by Gavin Johnson-Lynn (@gav_jl, gavinjl.me)
API Security Top 10 Mobile Top 10 Internet of Things Top 10
Levenshtein/Edit Distance
The “Levenshtein Distance”, also known as “Edit Distance”, is a metric of the “distance” between two strings – the number of edit operations (substitutions and deletions) needed to transform one string into another one. Its mathematical definition is recursive (inefficient).
To compute the Levenshtein distance efficiently, use an algorithmic example of a bottom-up Dynamic Programming. A matrix containing the Levenshtein distances between all prefixes of the first string and all prefixes of the second one. We can dynamically compute the values in this matrix. The last value computed will be the distance between the two full strings. https://python-course.eu/applications-python/levenshtein-distance.php
Profiling Python Code
https://machinelearningmastery.com/profiling-python-code/
Bandit vulnerability checker
Bandit transforms code into an abstract syntax tree (AST) to analyze vulnerabilities https://snyk.io/learn/security-vulnerability-exploits-threats/
Bandit error message flag “201:flask_debug_true” notes that running with debug=True exposes the Werkzeug debugger, which can execute arbitrary code.
PROTIP: On production servers, set debug == False to disable assert statements.
Resources:
- https://soshace.com/how-to-secure-python-web-app-using-bandit/
- https://bandit.readthedocs.io/en/latest/plugins/index.html
Known-bad sample Python code
https://github.com/Contrast-Security-OSS/vulnpy is a library of purposely-vulnerable Python functions to install as extensions in a framework (Flask, Django, Pyramid, Falcon, WSGI, Bottle, FastAPI). These serve as a foundation for creating insecure web applications, to be used for security testing and demonstration of vulnerability scanners.
Parallel Dask
VIDEO: dask.org runs on top of NumPy to scale Python libraries NumPy, pandas, and scikit-learn. Dask is included by default in Anaconda. You can also install Dask with Pip, or you have several options for installing from source. You can also use Conda to update Dask or to do a minimal Dask install.
Dask is used throughout the PyData ecosystem for parallel processing. It is included in many libraries today like Xarray, Prefect, NVIDIA RAPIDS, and XGBoost.
Adam Breindel held on OReilly “Scale your Python processing with Dask” Oct. 28, 2022. Dask array; Dask Bag.
It’s community-govered and sponsored by NumFOCUS.
Specify cluster = LocalCluster() resource manager to use locally.
Specify cluster = KubeCluster() or cluster = ECSCluster() to use in clouds.
AzureML
az ml run submit-script test.py \
   --target compute-instance-test \
   --experiment-name test_example \
   --resource-group ex-test-rg \
   --workspace-name test-ws
Access Google Sheets
- https://medium.com/analytics-vidhya/how-to-read-and-write-data-to-google-spreadsheet-using-python-ebf54d51a72c
Reduce risk of data loss on your laptop by storing data in cloud environments managed by pros.
Here is how to do it with Google Sheets, which is FREE using your Gmail account:
- If you haven’t already, get a Google account (with a email address Gmail.com).
-
Get in the Google API Console at https://console.developers.google.com or https://console.cloud.google.com
You will be brought to your default project, such as:
https://console.cloud.google.com/apis/dashboard?pli=1&project=weather-454da - Click your project name at the upper-right for the “Select a project”.
-
Click “NEW PROJECT”. CREATE. The name you provide is combined with the project code generated by Google to create the globally unique service name, which is like an email address. Such as:
XXX-compute@developer.gserviceaccount.com
- Click “ENABLE APIS AND SERVICES”.
- Search for Google Drive API. Click on it among results. Click “ENABLE”.
-
In the sidebar, click Credentials.
-
Click CREATE CREDENTIALS at the top. Select “Service account” (Enables server-to-server, app-level authentication using robot accounts).
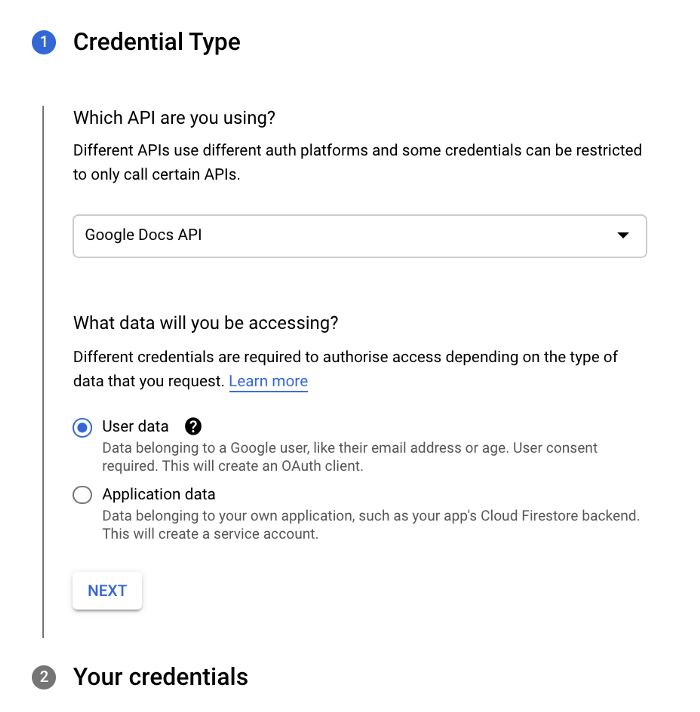
- VIDEO: Click the “hamberger” icon at the upper-left for “IAM & Admin” -> “Service Accounts” -> “CREATE SERVICE ACCOUNT”.
-
For “Service account name”, come up with a name.
The “Service account ID” and email are generated based on your input above.
- Type a Service account description.
- Click “CREATE AND CONTINUE”.
- Select a role. Full access is granted to Basic -> Owner.
- CONTINUE. DONE.
- Click the three-dot icon to the right of the service account just created to
select Manage Keys. - ADD KEY to select “Create new key”. Select “JSON” (instead of P12). CREATE.
-
Save it to your personal folder, not within a GitHub repo. CLOSE the confirmation pop-up.
PROTIP: If you have several Google projects, keep a list of the names Google assigned.
CAUTION: Notice that the Key expiration date is year “9999”.
PROTIP: Instead of using a service account key, use workload identity federation to grant Google Cloud access to external multi-cloud workloads (AWS, Azure OIDC, SAML 2.0, etc.). It uses temporary tokens from workload identity pools.
-
??? Principal??? Select Compute Engine service default, JSON, hit create.
-
Open up the JSON file, share your spreadsheet with the API ID.
-
Save the credentials file (formatted in JSON) for the Python program below to read. For example:
/Users/johndoe/github-johndoe/repo1/creds.json
Google provides the API for:
- Bulk document creation
- Content Management
- Workflow Management
Python code samples make use of the Pandas library.
TODO: In a Google Doc, find a marker such as “QUESTION:” and extract the sentence next to it, then paste that sentence in a Google Sheet. Perhaps using the SpaCy library, https://spacy.io/ - a Python library for Natural Language Processing (NLP) to recognize the meaning of tokens within each sentence, as described in https://towardsdatascience.com/how-to-extract-structured-information-from-a-text-through-python-spacy-749b311161e using https://github.com/alod83/data-science/tree/master/TextAnalysis
Access Google Docs
* https://developers.google.com/docs
- https://developers.google.com/docs/api/quickstart/python
- https://towardsdatascience.com/how-to-load-the-content-of-a-google-document-in-python-1d23fd8d8e52
</em>
Access Google Sheets
- https://developers.google.com/sheets/api/quickstart/python
- https://erikrood.com/Posts/py_gsheets.html
- https://www.youtube.com/watch?v=cnPlKLEGR7E
- https://blog.coupler.io/python-to-google-sheets/#Python_script_to_export_Excel_to_Google_Sheets
- https://www.youtube.com/watch?v=4ssigWmExak
-
Examine the library: https://github.com/nithinmurali/pygsheets
-
On a Mac Terminal with Python installed,
pip install pygsheets
-
Create a Google Sheet.
-
The code
import pygsheets
import pandas as pd
GOOGLE_CREDS_FILE="/Users/erikrood/desktop/QS_Model/creds.json"
#authorization
gc = pygsheets.authorize(service_file=GOOGLE_CREDS_FILE)

# Create empty dataframe
df = pd.DataFrame()

# Create a column
df['name'] = ['John', 'Steve', 'Sarah']

#open the google spreadsheet (where 'PY to Gsheet Test' is the name of my sheet)
sh = gc.open('PY to Gsheet Test')

#select the first sheet in the file:
wks = sh[0]

#update the first sheet with df, starting at cell B2.
wks.set_dataframe(df,(1,1))
Image to Text
https://developer.ibm.com/tutorials/document-scanner/
Image manipulation
https://googlecoursera.qwiklabs.com/focuses/28467918?parent=lti_session tutorial about using Pillow library</a>
“Automating Real-World Tasks with Python” by SRE Matt Gaunt - how to extend the capabilities of your python code by using some modules and libraries such as Python image library (PIL) to work with images and also learn how to communicate with the world outside of your network such as using APIs and more.
- Use the Pillow Python Imaging Library (import PIL) to do the following to a batch of images: Open an image, Rotate an image, Resize an image, Save an image in a specific format in a separate directory.
- Python Requests two programs to communicate with each other. Data serialization to a Comma-Separated Value (CSV) or JSON (JavaScript Object Notation) file.
- https://github.com/wilsonmar/systematic - a collection of OS level and programming tools for python, mainly just packing stuff I use all the time to one place.
zzzz
Working with GCP
API libraries
Google has two libraries explained:
* "Google API Python client library" at<br />https://github.com/googleapis/google-api-python-client<br />is a large (200 MB+) containing <strong>all APIs</strong>. Install it by<br /><tt>pip3 install google-api-python-client</tt><br />It supports only REST, not gRPC.

* "Cloud Client Libraries for Python" at<br />https://github.com/googleapis/google-cloud-python supports gRPC as well as REST. So use this recommended one, described at https://cloud.google.com/apis/docs/cloud-client-libraries
Each APIs listed alphabetically (with links) at: <ul> https://cloud.google.com/python/docs/reference </ul>
Only a subset of the services listed above are implemented as a Python package named the same (with dashes) at:
<ul>
https://github.com/googleapis/google-cloud-python/tree/main/packages
</ul>
But some are not in GitHub, such as “Google Tasks” = google-cloud-tasks at
<ul>
https://cloud.google.com/python/docs/reference/cloudtasks/latest
which describes itself as “a fully managed service that allows you to manage the execution, dispatch and delivery of a large number of distributed tasks. You can asynchronously perform work outside of a user request. Your tasks can be executed on App Engine or any arbitrary HTTP endpoint.”
So I scraped the two to create a reconciliation Google Sheet CSV file.
Auth: https://cloud.google.com/tasks/docs/reference/libraries#python
</ul>
For a list of Service APIs:
https://cloud.google.com/python/references/apis
https://developers.google.com/discovery/v1/using#build Google API Discovery Service
Auth to GCP
Sample Code for GCP
For a list of sample code snippets, see
https://cloud.google.com/docs/samples?l=python
Working with Google Workspace SaaS apps
* https://developers.google.com/docs/api/quickstart/python
* https://developers.google.com/workspace/products
* https://cloud.google.com/python/docs/reference
* https://github.com/googleapis/google-cloud-python
Select a service at https://console.cloud.google.com/apis/library
* Admin Console => https://console.cloud.google.com/apis/library/admin.googleapis.com
* Apps Script => https://console.cloud.google.com/apis/library/script.googleapis.com
* Classroom => https://console.cloud.google.com/apis/library/classroom.googleapis.com
* Cloud Search => https://console.cloud.google.com/apis/library/cloudsearch.googleapis.com
* Drive => https://console.cloud.google.com/apis/library/drive.googleapis.com
* Drive Labels => https://console.cloud.google.com/apis/library/drivelabels.googleapis.com
* Calendar => https://console.cloud.google.com/apis/library/calendar-json.googleapis.com
* CalDAV => https://console.cloud.google.com/apis/library/caldav.googleapis.com
* Cloud Identity => https://console.cloud.google.com/apis/library/cloudidentity.googleapis.com
* Chat
* Docs => https://console.cloud.google.com/apis/library/docs.googleapis.com
* Drive => https://console.cloud.google.com/apis/library/drive.googleapis.com
* Drive Activity => https://console.cloud.google.com/apis/library/driveactivity.googleapis.com
* Forms => https://console.cloud.google.com/apis/library/forms.googleapis.com
* Gmail => https://console.cloud.google.com/apis/library/gmail.googleapis.com
* Groups => https://console.cloud.google.com/apis/library/groupssettings.googleapis.com
* Keep => https://console.cloud.google.com/apis/library/keep.googleapis.com
* Meet ? => https://console.cloud.google.com/apis/library/meet.googleapis.com
* People => https://console.cloud.google.com/apis/library/people.googleapis.com
* Reseller => https://console.cloud.google.com/apis/library/reseller.googleapis.com
* Sheets => https://console.cloud.google.com/apis/library/sheets.googleapis.com
* Sites ? => https://console.cloud.google.com/apis/library/sites.googleapis.com
* Slides => https://console.cloud.google.com/apis/library/slides.googleapis.com
* Tasks => https://console.cloud.google.com/apis/library/tasks.googleapis.com
* Vault => https://console.cloud.google.com/apis/library/vault.googleapis.com Data management and eDiscovery for Google Workspace.
* Workspace Marketplace => https://console.cloud.google.com/apis/library/appsmarket-component.googleapis.com <a target="_blank" href="https://googlecoursera.qwiklabs.com/focuses/28468512?parent=lti_session">HANDS-ON</a>
Tutorials:
- https://hands-on.cloud/python-google-sheets-api/
Performance Testing
Will the app break under heavy load?
Python developers use Locust at https://github.com/locustio/locust – a simple-to-use, distributed load-testing tool.
Locust (at https://locust.io) was created by Jonatan Heyman and is maintained by Lars Holmberg based in Stockholm.
Resources:
- https://content.microfocus.com/performance-engineering-tb/performance-engineering-resources
##
https://github.com/r-lib/gargle/ for R
References
Other Python project templates:
-
https://github.com/MartinHeinz/python-project-blueprint by Martin Heinz in Russia
-
https://dev.to/codemouse92/dead-simple-python-project-structure-and-imports-38c6
Update your macOS packages with a single command | Towards the Cloud
Learn Enough Python to Be Dangerous: Software Development, Flask Web Apps, and Beginning Data Science with Python by Michael Hartl has code at https://github.com/learnenough/learn_enough_python_code_listings
Other APIs
Google Firebase for authentication
Plaid for Bank Transactions
Run metrics databases online
Here are the various cloud-based time-series databases for the collection and trending/analytics of custom metrics (using free trials):
- Amazon CloudWatch
- Azure Monitor
- Alteryx Metrics Store
- AppOptics (Solar Winds)
- Datadog
- Dynatrace
- ManageEngine
- ManageEngine Site24x7 ($9/month)
- Opsview
- Paessler PRTG
- Splunk
Keep processing messages from appearing
https://app.dataquest.io/c/114/m/605/python-programming/1/learning-data-science?path=2&slug=data-scientist&version=2
100 Days of Code
https://www.geeksforgeeks.org/100-days-of-code-a-complete-guide-for-beginners-and-experienced/#100%20days%20of%20code%20for%20experienced
Code Formatting Tools
https://prettier.io/
Debugging
https://towardsdatascience.com/introducing-icecream-never-use-print-to-debug-your-python-code-again-d8f2e5719f8a
Security operations
Log analysis
Malware analysis
Access control list management
Intrusion detection
Compliance checks
Network scanning
Resources
https://tomdeneire.medium.com/til-benchmarking-a-single-get-request-with-5-different-python-http-libraries-fce2bf0c86a4
More about Python
This is one of a series about Python:
- Python install on MacOS
- Python install on MacOS using Pyenv
- Python tutorials
- Python Examples
- Python coding notes
- Pulumi controls cloud using Python, etc.
- Test Python using Pytest BDD Selenium framework
- Test Python using Robot testing framework
- Python REST API programming using the Flask library
- Python coding for AWS Lambda Serverless programming
- Streamlit visualization framework powered by Python
- Web scraping using Scrapy, powered by Python
- Neo4j graph databases accessed from Python